


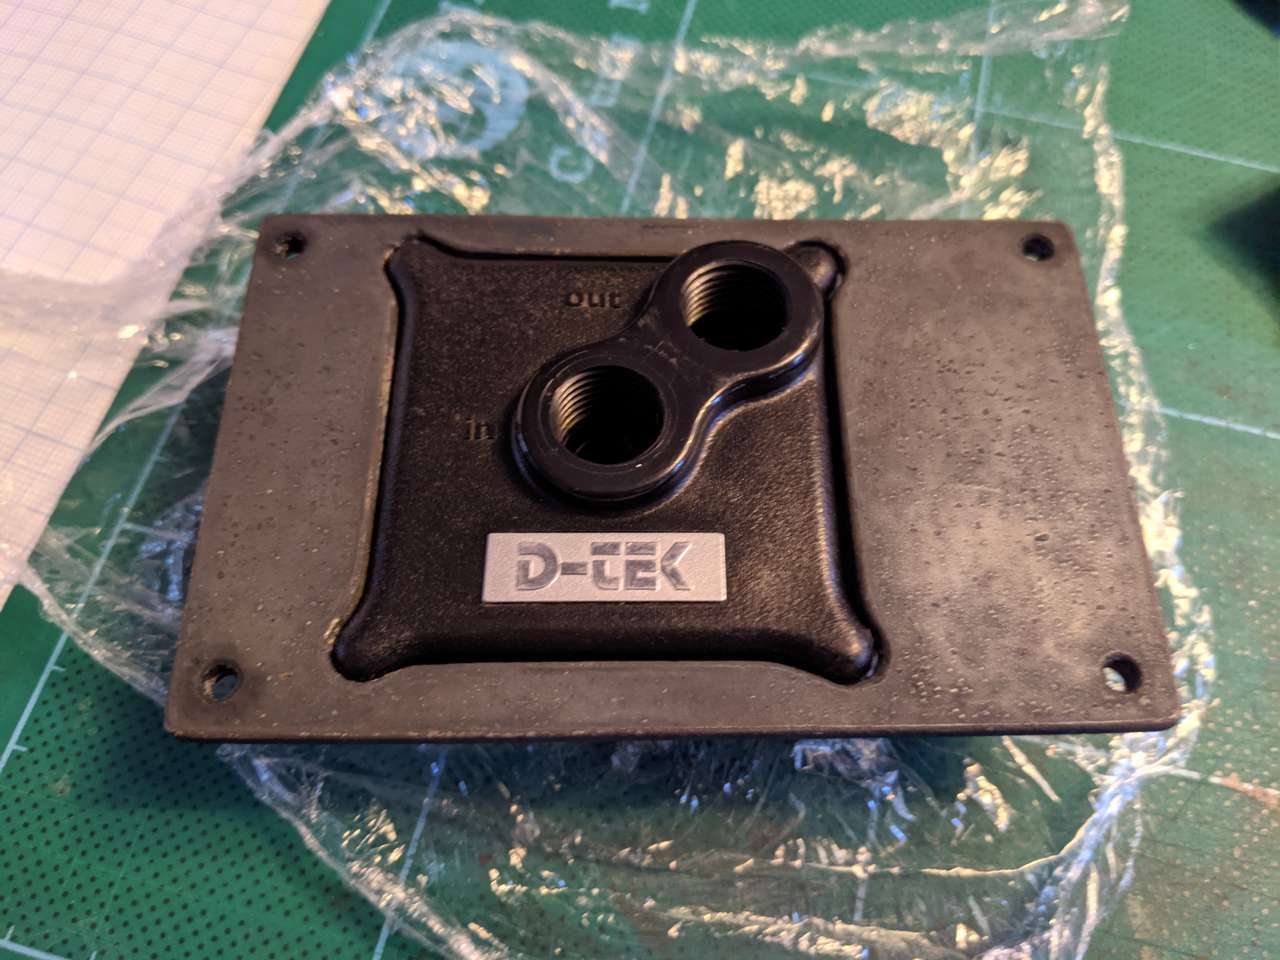
Most CPU coolers, whether air-cooled heatsinks or water-cooled blocks, are essentially just a slab of metal that touches the CPU to remove heat from it and some “other stuff”. The hold-down bracket that enables the block to attach to the CPU is one of these other things, and is made to support one or more CPU sockets. The most recent CPU platforms that the D-Tek FuZion CPU water block supports are Intel socket 775 and AMD socket AM2. I’m building a high performance PC on the AMD socket AM4 platform and wanted to re-use the old water block.
Design considerations
FuZion AMD bracket
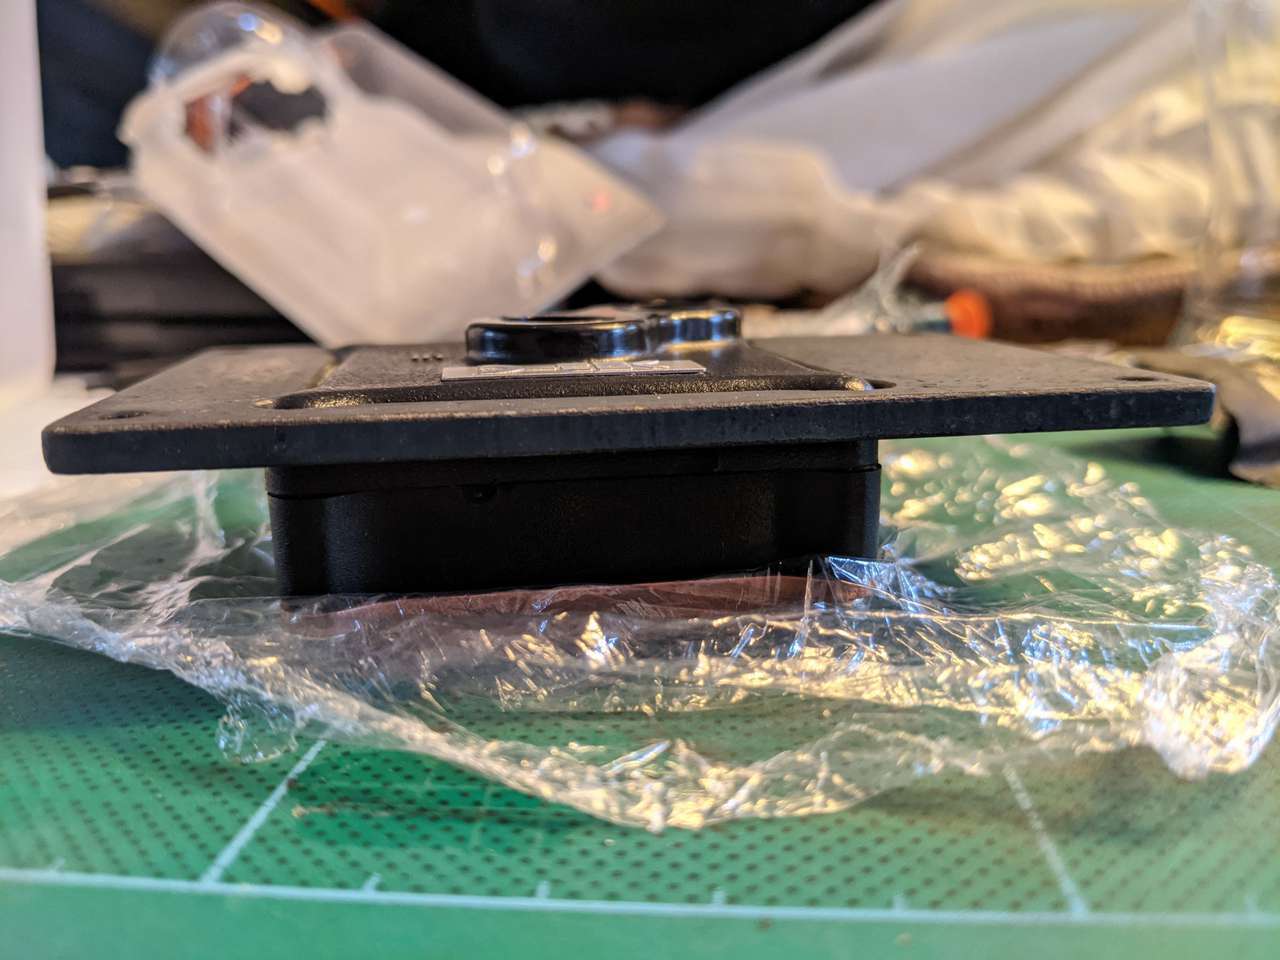
The original AMD bracket supported a few different CPU sockets, but sadly there isn’t enough material around the edges to adapt it from the 96 x 48 mm hole layout, to the 90 x 54 mm spacing for AM4.
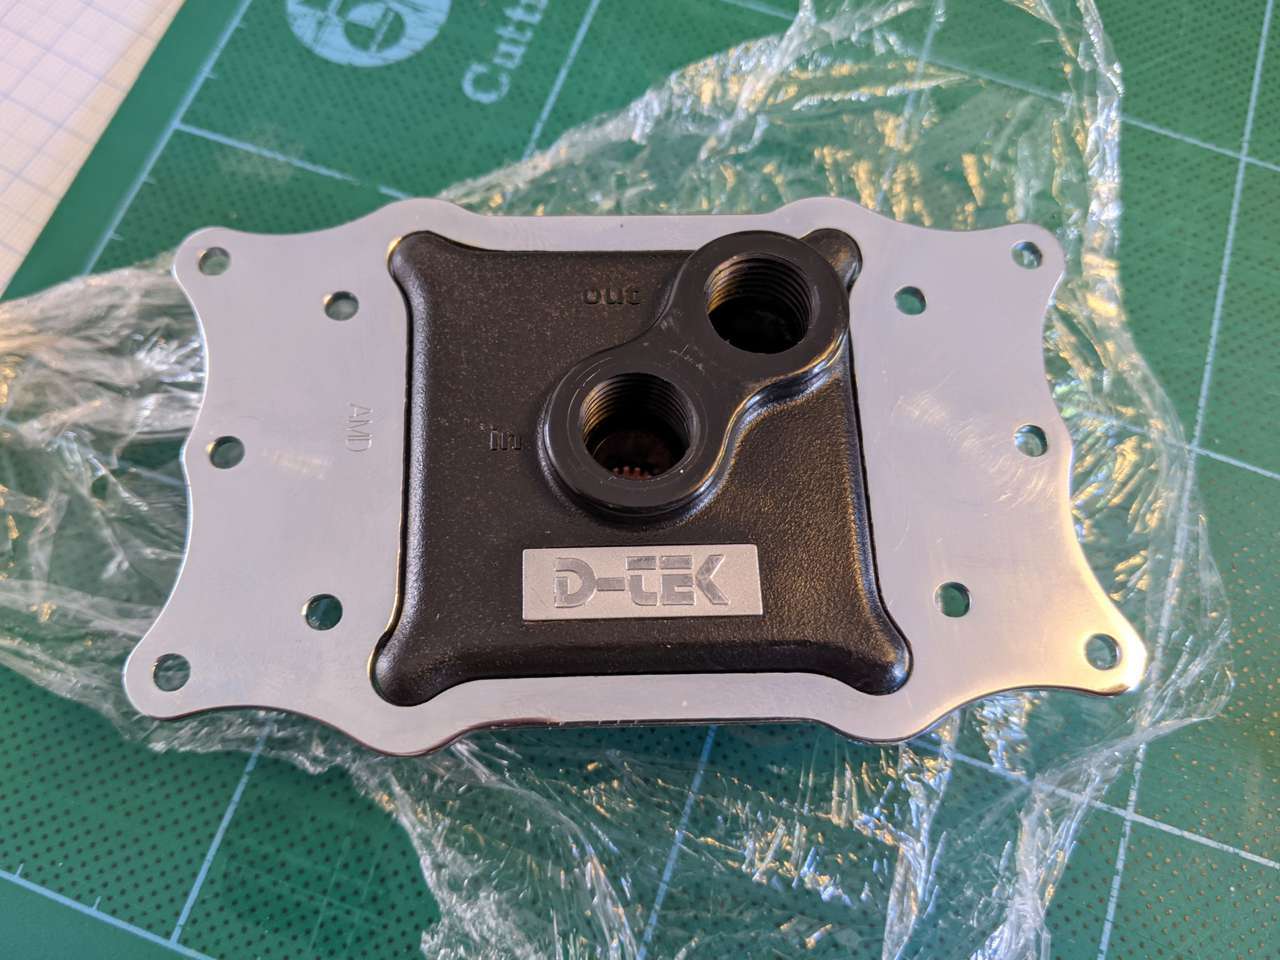
I’m not really fond of the silhouette of this bracket, and the support of multiple sockets with the various holes makes it even more visually unappealing.
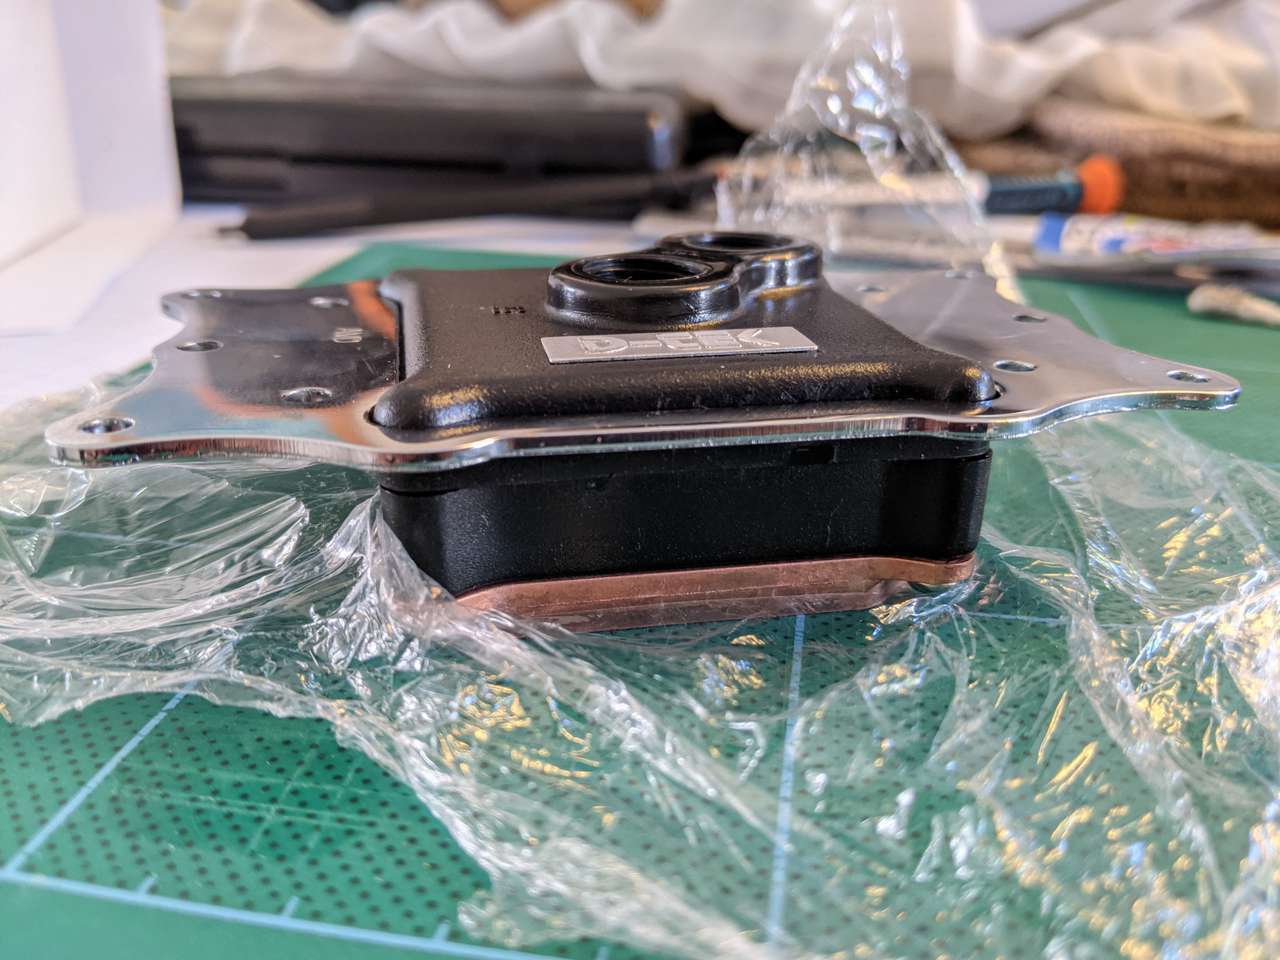
From the side, you can see the bracket sits on a ledge/lip around the top of the water block, but the top of the bracket is not flush with the top. I don’t really like this non-flush look either, so I wanted to make a 4mm thick rectangular shape to bring this old block into the modern age.
Offset for AMD Ryzen 5000 series
I chose the 5950X CPU for my build and noticed Steve at Gamers Nexus reviewed the 420mm Arctic Freezer II CPU Cooler that features an alternate bracket for a slightly offset mount of the CPU block. Roman “der8auer” Hartung has developed an adjustable bracket to provide the same type of offset.
Why offset the CPU water block? The chiplets, or cores part, of the CPU are located slightly to the side. I measured this to be a 7mm offset to the left by using a high-resolution image of the 5600X IHS de-lidding attempt that was unsuccessful (but did provide the peek under the hood). I drew out a cutting template for my bracket by tracing the original AM2 bracket hole around the block and then drew a rectangular outline, moved 7mm over, for my new bracket on some graph paper.
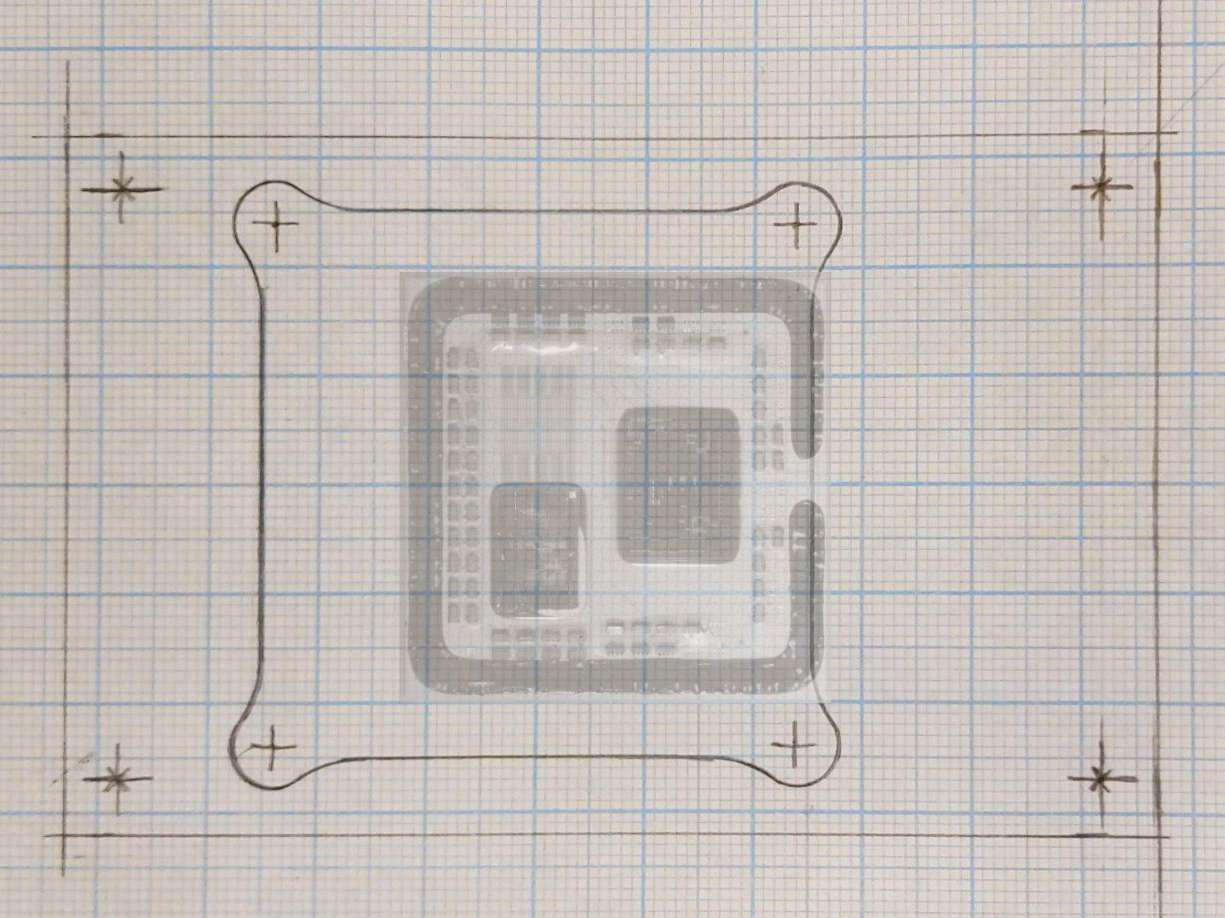
With the Ryzen CPU image overlaid, you can see that while the CPU is centred in relation to the bracket and the CPU block is offset to the left, the centre of the CPU block is aligned with the chiplets.
Black theme
The new PC has a black industrial theme, so I wanted to use a metal that I could surface treat to turn the metal black, to make it more scratch-resistant than a painted surface.
Although aluminium can be anodised black, and is very easy to cut, I’ve often found anodised aluminium can scratch pretty easily through the surface colour to reveal the shiny silver-coloured aluminium underneath and can even get chipped and bent.
Mild steel is something I’ve worked with before and, while it takes ages to drill and cut compared to aluminium, I had an idea of how tough it would be as a bracket. I found out about cold bluing steel, where you can brush on a chemical to oxidise the surface to become a dark grey/blue. Birchwood Casey Super Blue seemed to give the darkest, near-black results so I ordered some.
Cutting the bracket
Using the template
I cut the drawn bracket cutting template from the graph paper and stuck it with Pritt Stick to a small piece of 4mm mild steel plate.
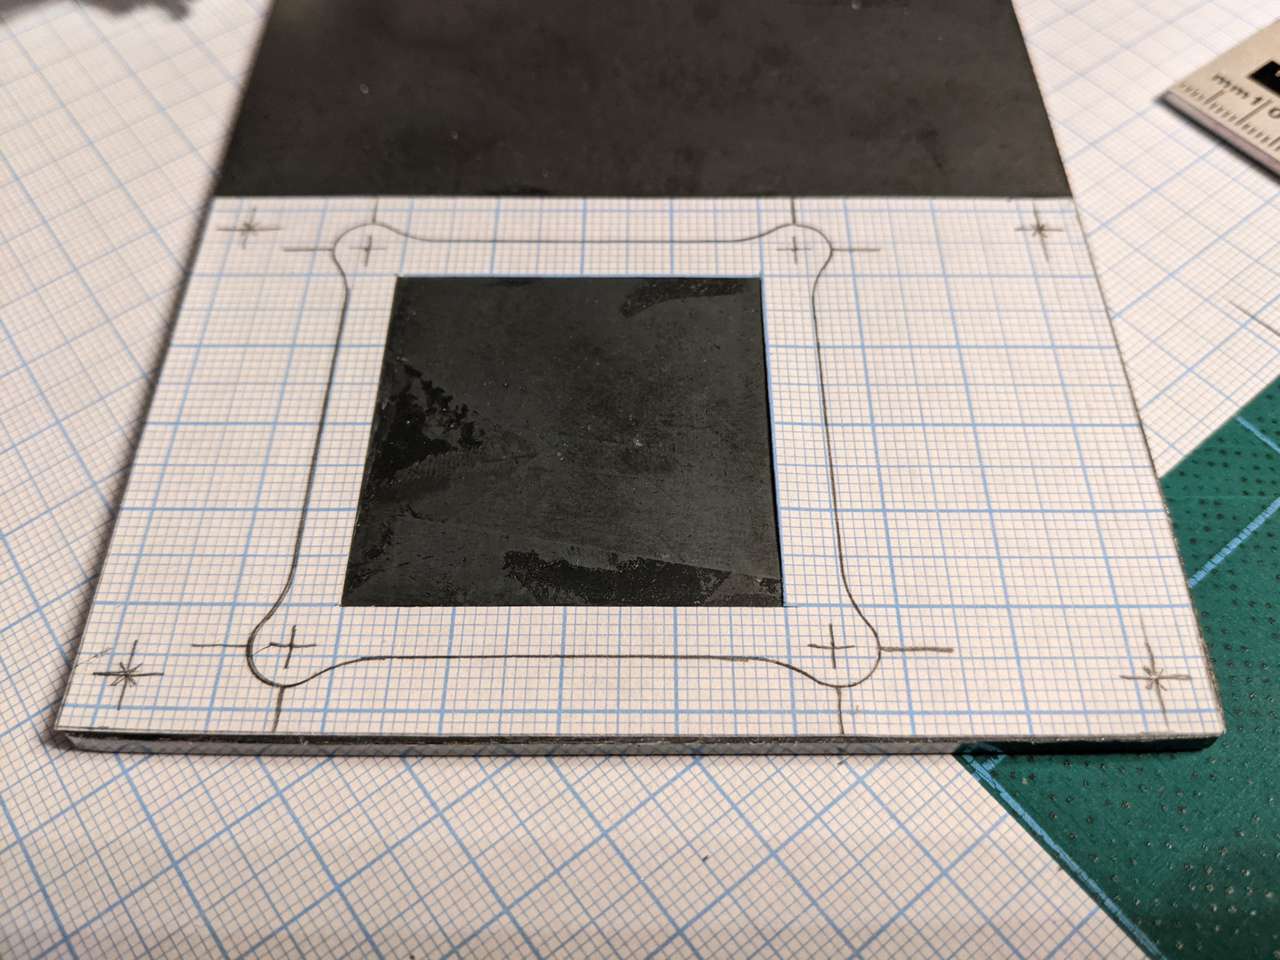
I decided to use Pritt Stick for an easy clean-up after cutting compared to a more heavy duty adhesive. It worked pretty well to hold the template in place, but when the paper eventually became saturated in oil (used for drilling and cutting), the pencil lines became really hard to distinguish from the graph lines. I think using a scribe to mark out the large hole, and centre-punch to mark the mounting holes would have made trying to judge the cutting/drilling accuracy a fair bit easier.
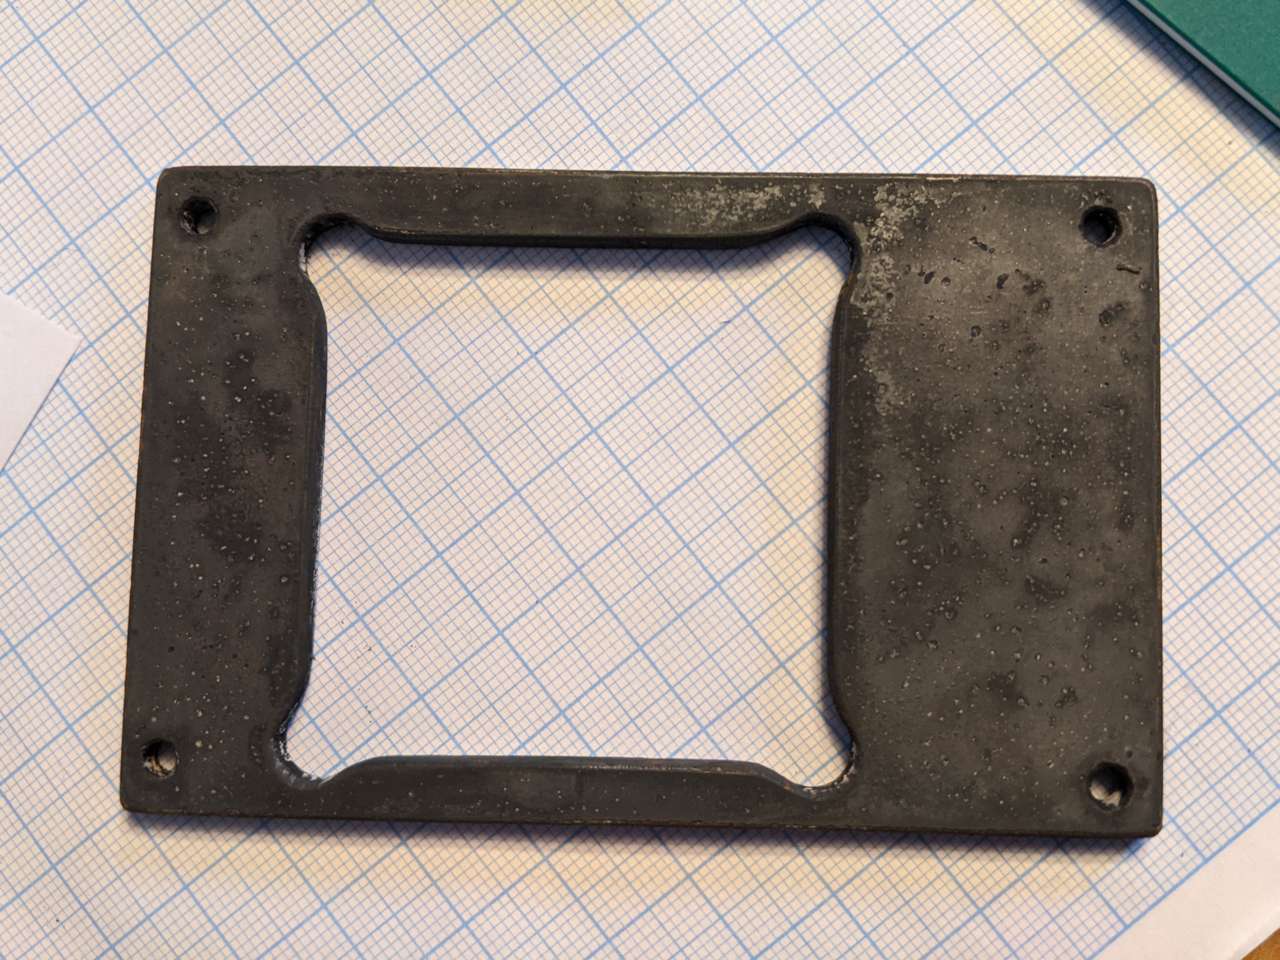
Rough result
After using a drill and jigsaw for what must have been over an hour, I ended up with something pretty close to the template. I used a countersink bit to chamfer the holes a bit.
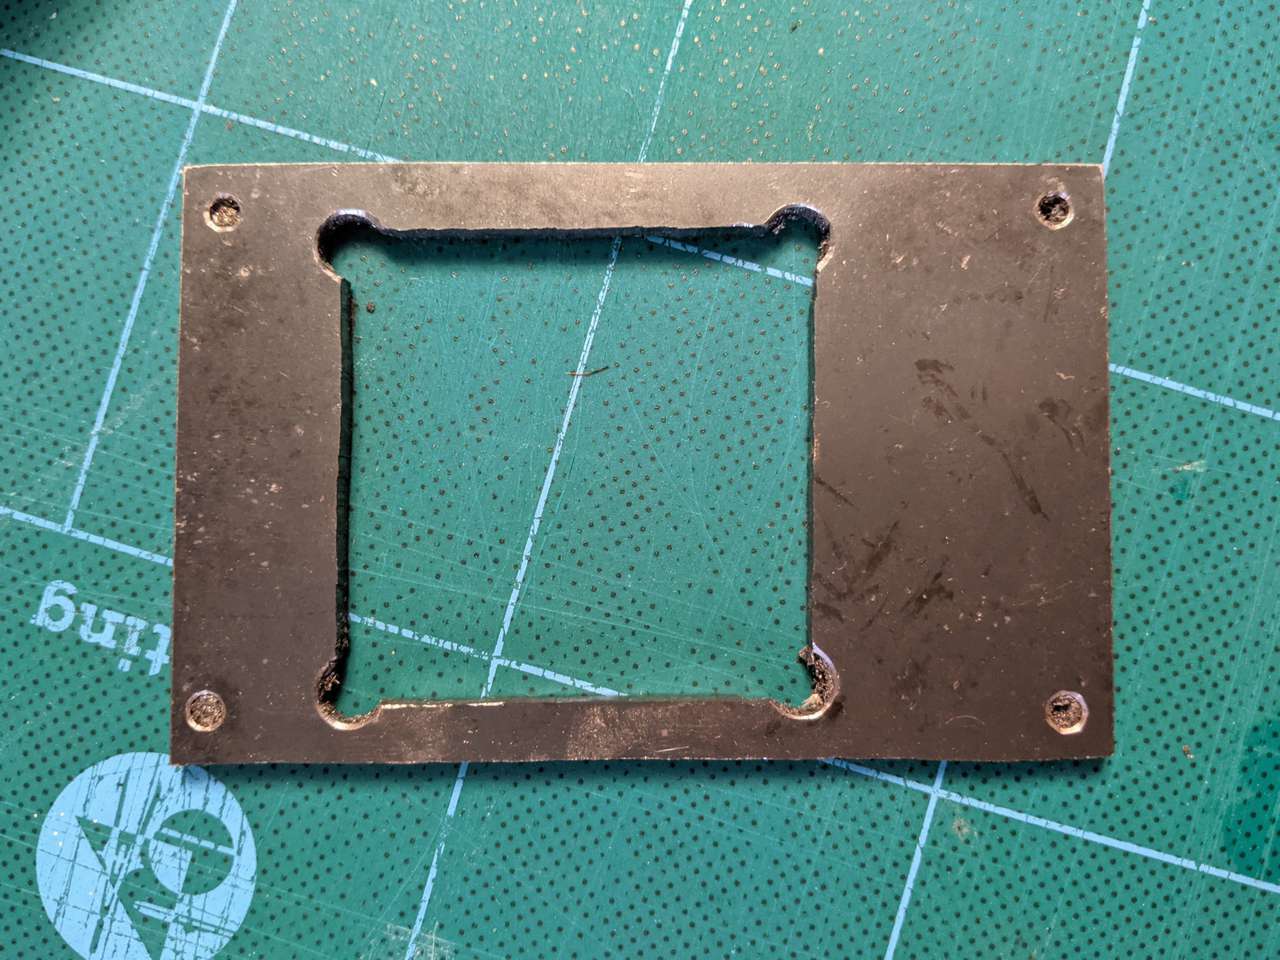
It wasn’t pretty and the holes and cuts weren’t 100% accurate, but it looked close enough to be usable.
Cleaned up
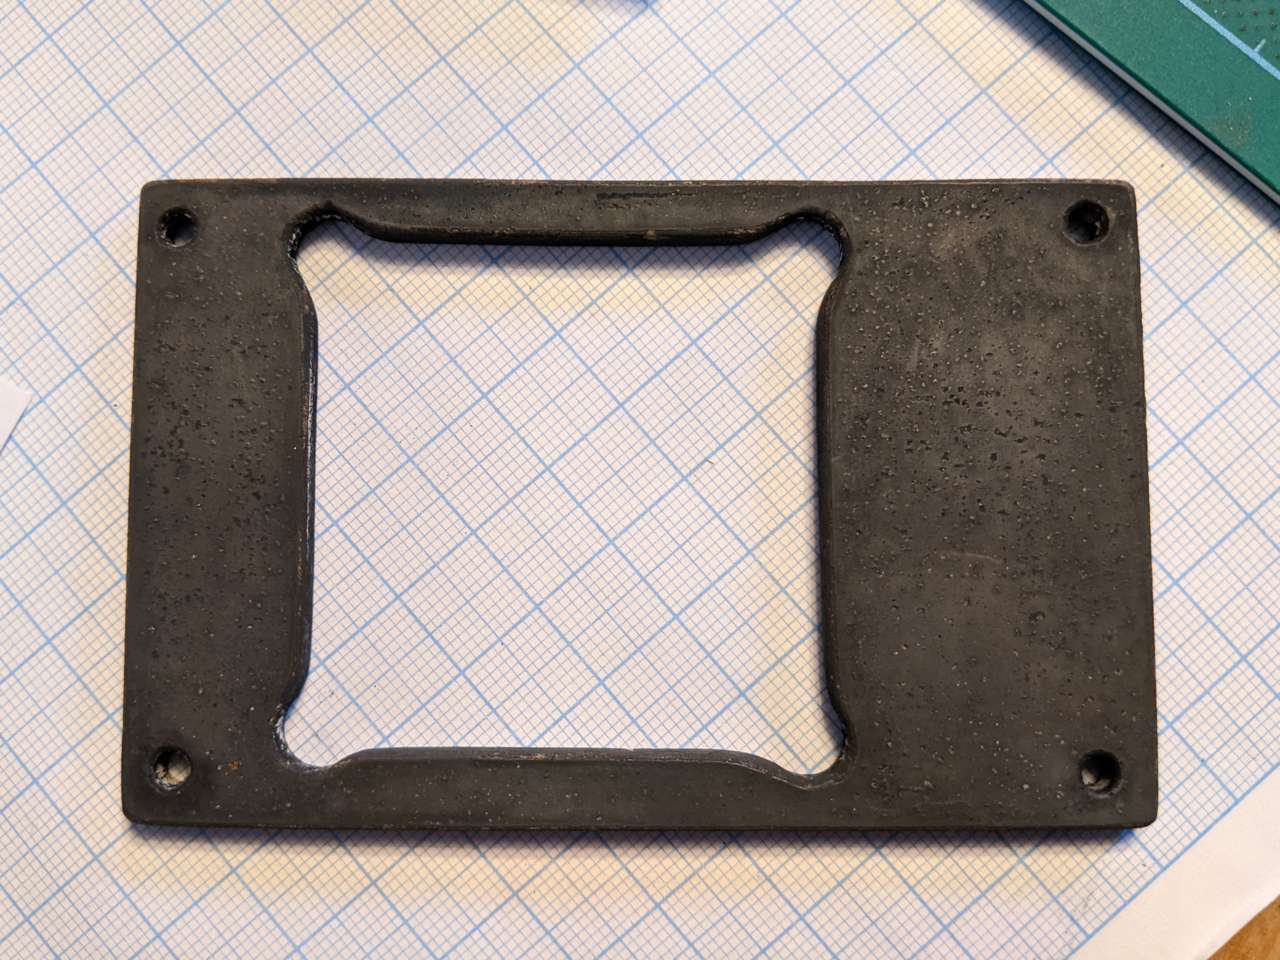
I used hand files to deburr and straighten up the cuts and make sure it fit properly on the top of the water block. I’d recently taken the time to clean the block and re-lap the surface, and covered the base with cling film to protect it against scratching with iron filings/swarf.
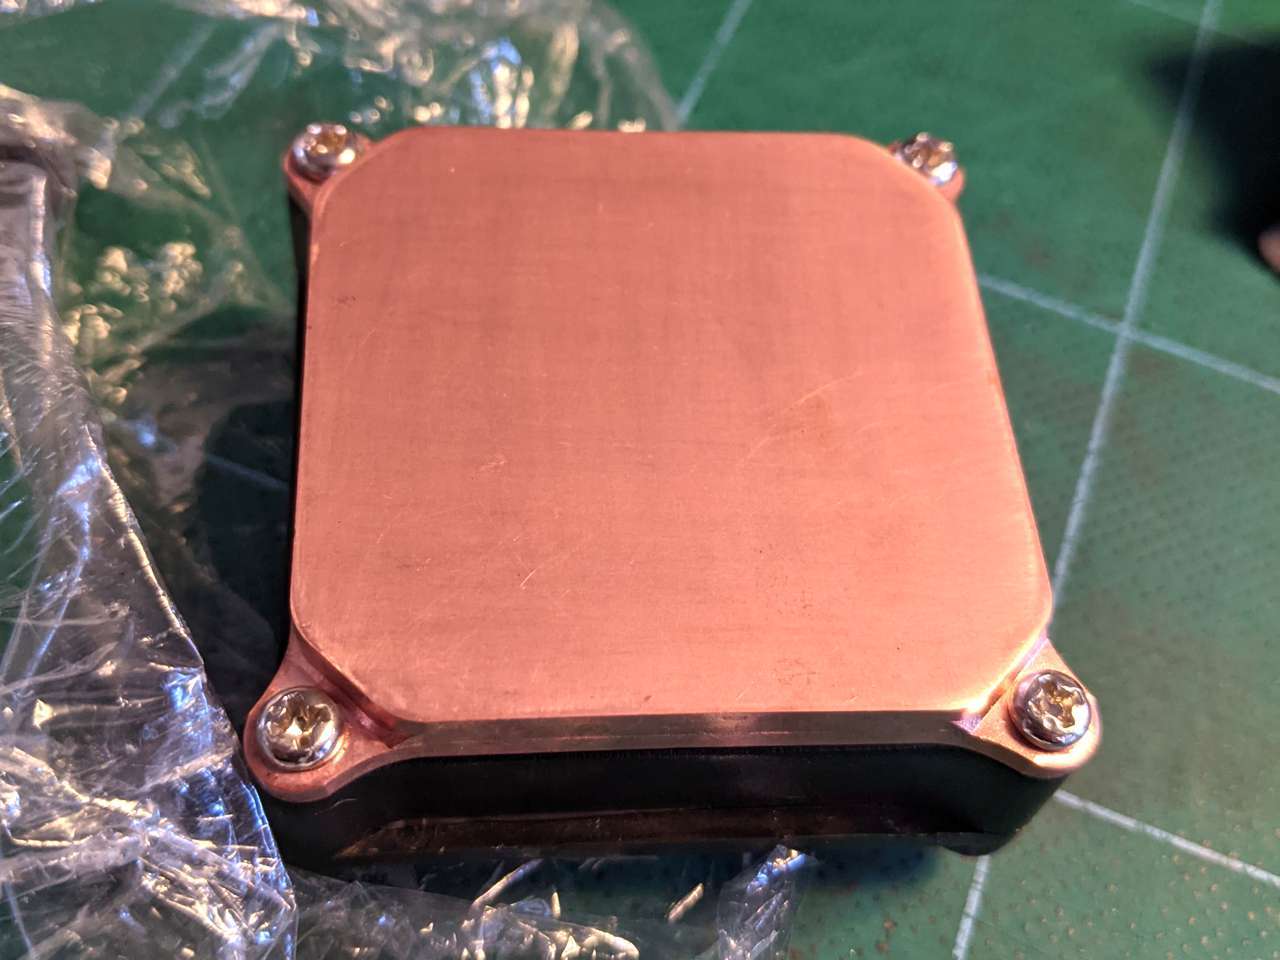
After the filing, the bracket fit well on the water block.

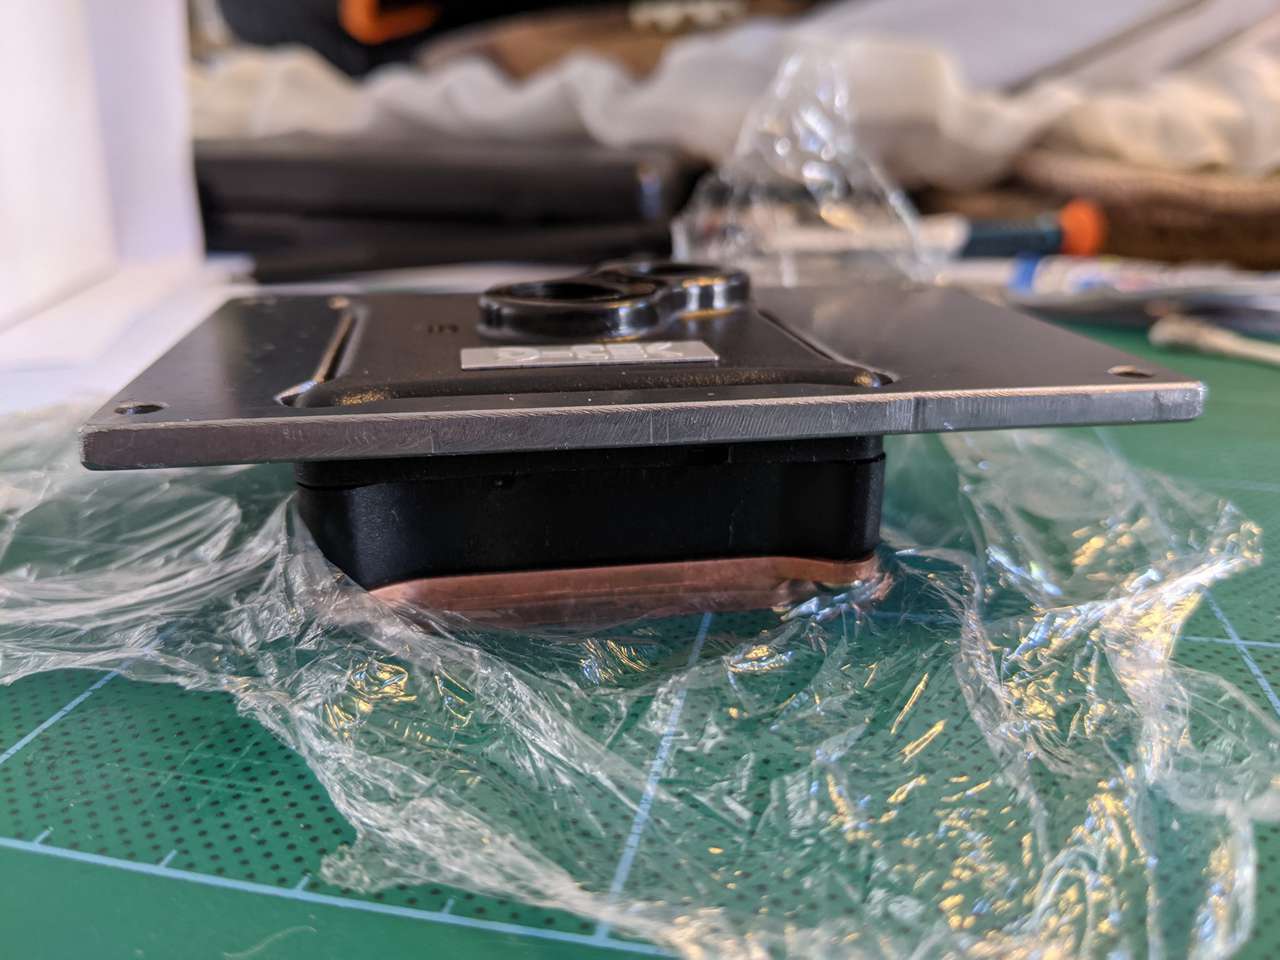
I like how the 4mm thick plate gives a more flush look, rather than the top of the block protuding more with the original bracket.
Time to go dark
Cold-blued steel
The surface of the mild steel I got was already blue, but I wanted it darker and with a more matte finish. After submerging the bracket in a shallow plastic container with Super Blue for about 20 minutes, I ended up with a darker, slightly pitted piece of steel.
The colour appears darker when indirectly lit.
Rust
After leaving the bracket in the original cardboard box for a day or two, it developed some slight surface rust around the cut surfaces. I think after cold-bluing steel you’re supposed to oil the metal (e.g. when doing it on guns), and I had not done that.
I used some wire wool to very gently get the orange rust off, cleaned with IPA (isopropyl alcohol, not the beer kind), and did another round of cold-bluing. After removing the bracket from the chemical solution and drying it, I applied some restoration wax that is used to preserve old metal things like medieval weapons!
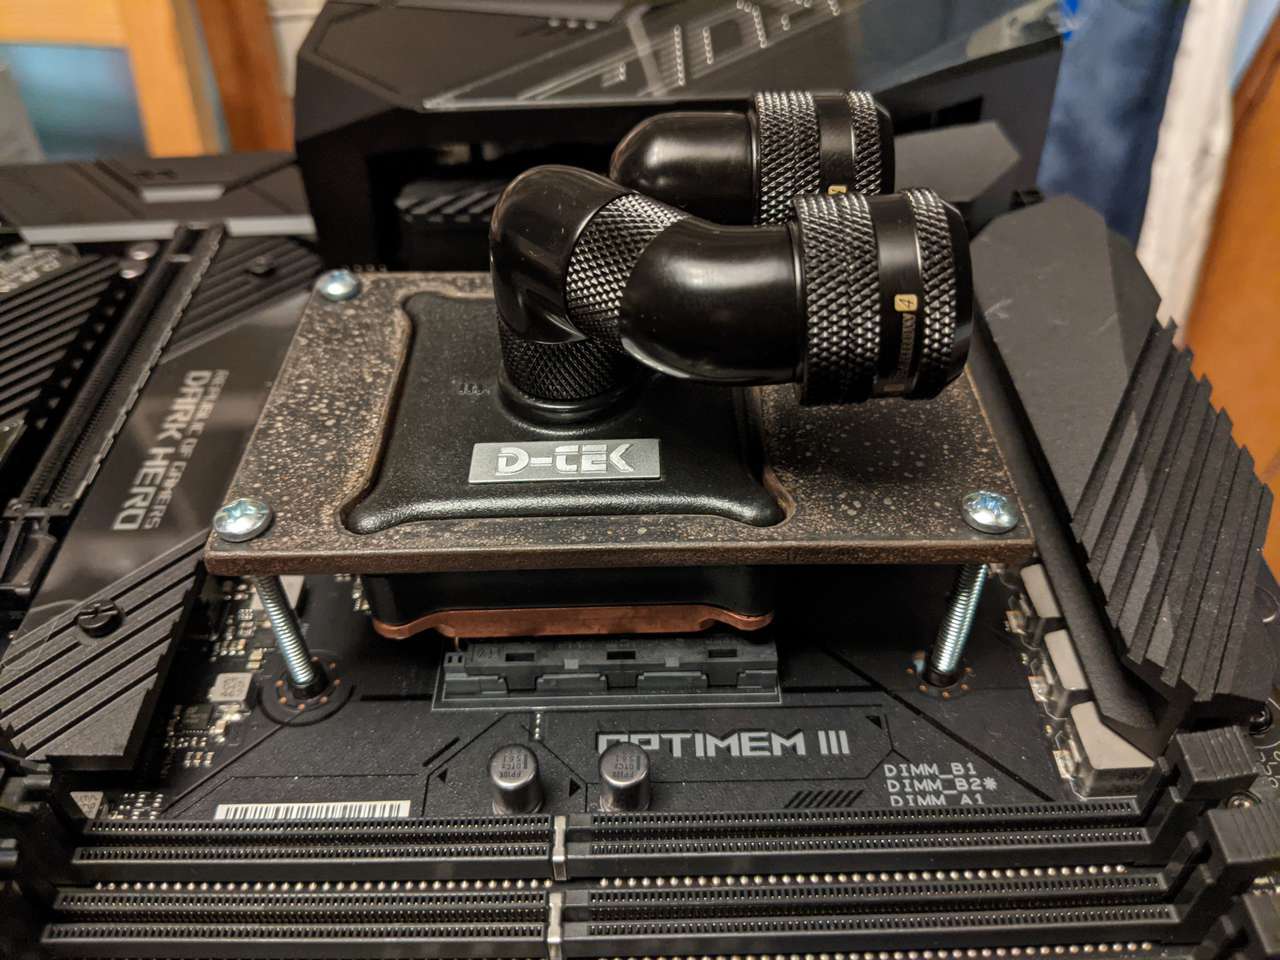
Test fitting on the Dark Hero
I found some long #6-32 screws in my collection and tried them out to mount the water block on the CPU with the new bracket.
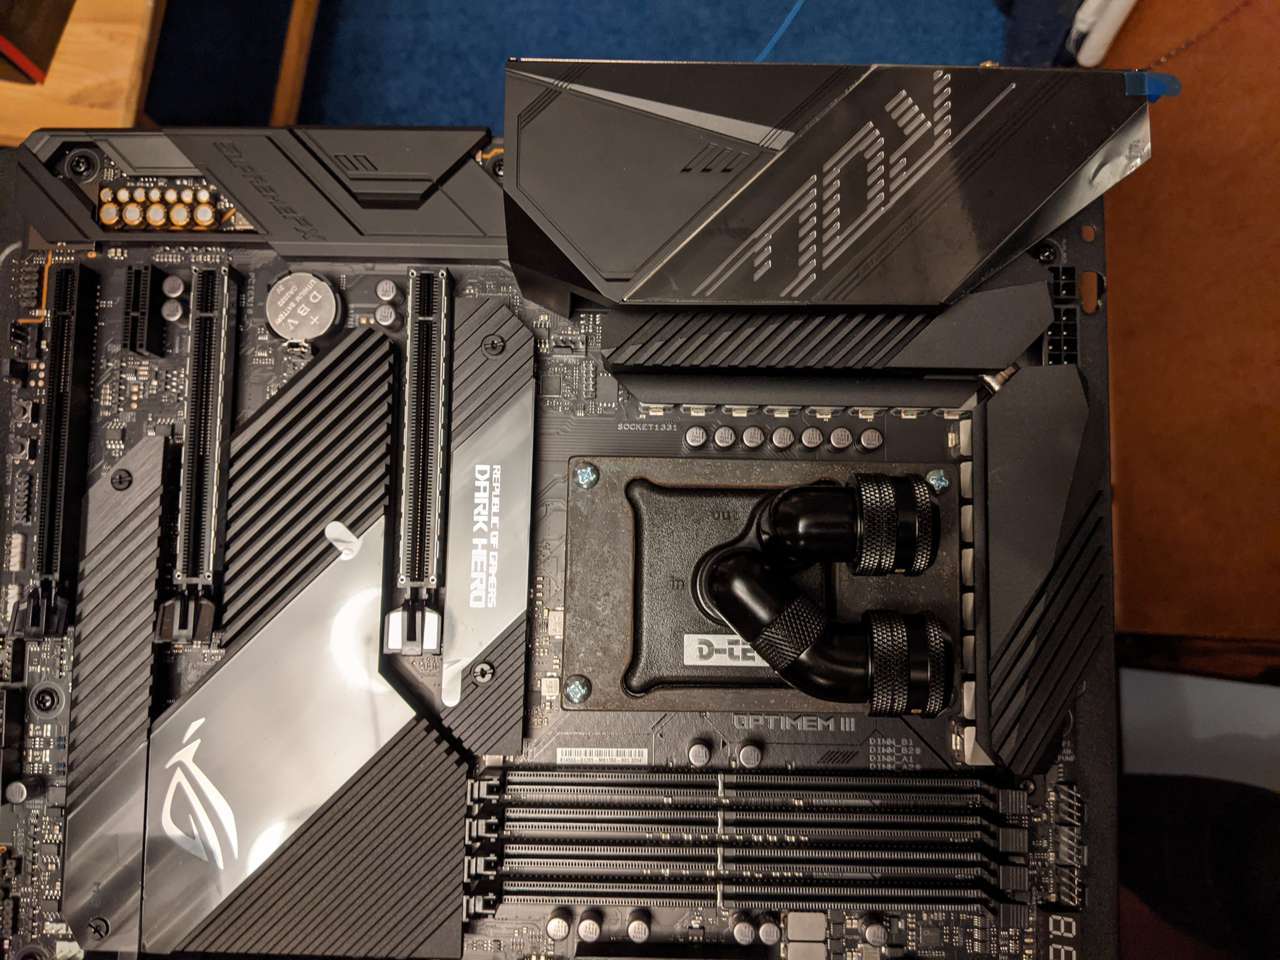
Even though the bracket is pitted and slightly rough looking, and not an exact match for the Asus ROG Crosshair VIII Dark Hero’s black theme, it looks at home here.
The screws are long enough to make decent contact with the backplate threads, but without any springs. I might get some black screws at some point, so might get longer ones to allow springs to be used. I don’t think springs are a necessity for mounting the block to the CPU though, as long as the torque is evenly and not too heavily applied.
Final thoughts
I’m pretty happy with how this turned out. It’s usable and rugged. But, the steel drilling and cutting took ages and I wouldn’t want to do it with hand-held power tools again. The pitting and (unwaxed) rusting of the steel was unexpected, so if I wanted a cleaner “factory finish” I’d probably either try out powder-coating steel (or aluminium) or maybe see how an anodised aluminium finish holds up.
Another option would be to draft the bracket design up as a CAD/3D file and get a company to cut and finish it for me, but that would likely cost a lot more than a DIY job. Also that’s less fun (and cheating a bit?!)
With the CPU water block bracket done, I could move on to reviving more (perfectly serviceable) old hardware for a brand new PC build.
Stay tuned…