


After doing most of the hardline tubing for the water cooling loops, I’d finished adding components into the case and just had two remaining sections of tubing to add, so I could see where all the cabling could and should go.
Rather than show you the whole tedious process, I’ll show some of the notable highlights with the cable management that I did to get this build looking neat and tidy.
Front panel LEDs/switches case cable
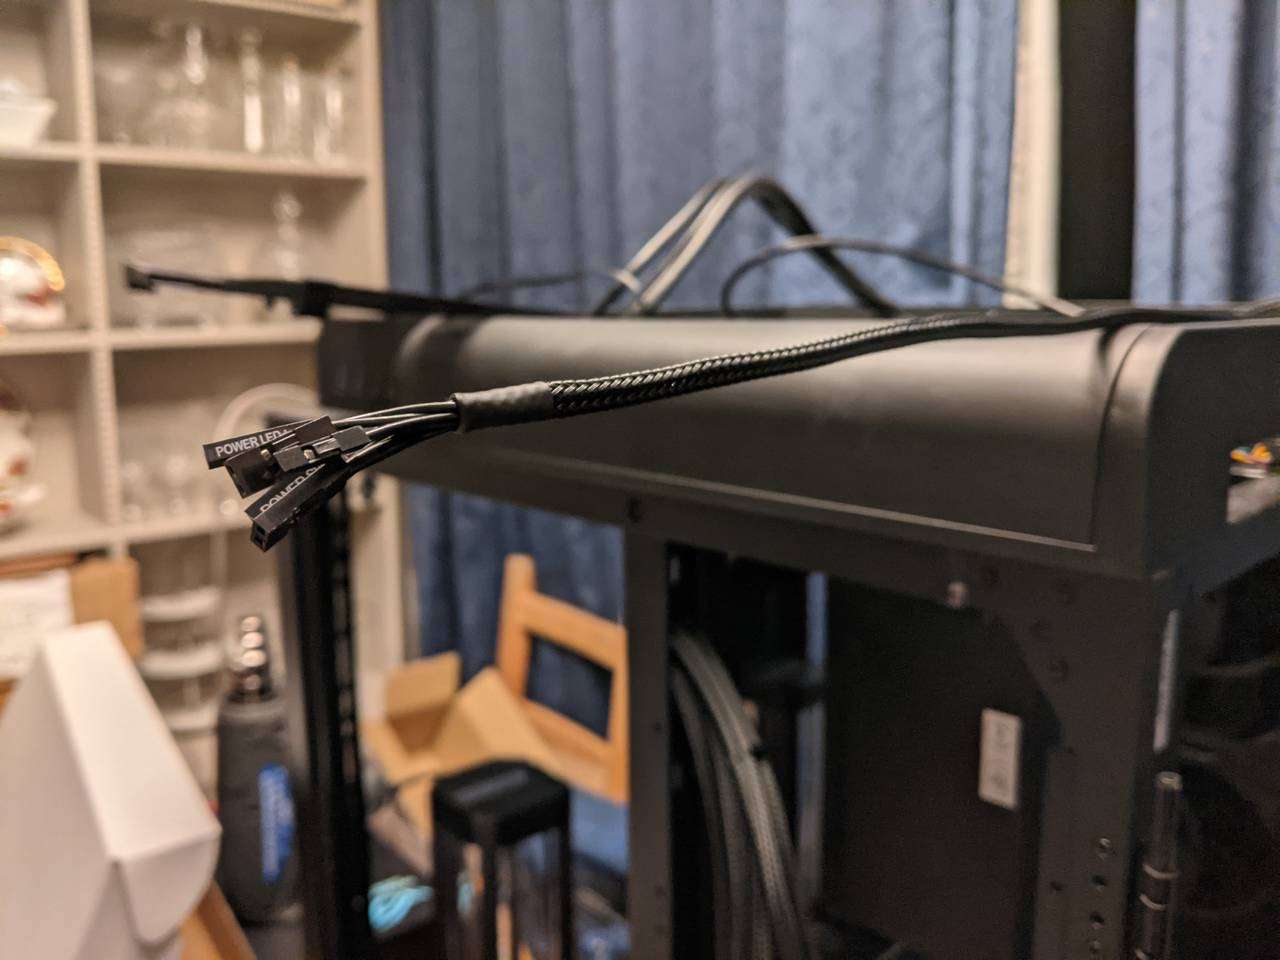
The cable for the case’s LEDs and switches is a black flat ribbon cable. It’s nice that it’s black, but the foldy, floppy, creased ribbon just looked a bit rubbish, so I separated the ribbon wires apart by pulling them away from each other down the length of the cable, one by one. Then I used some MDPC-X sleeving and heatshrink to bundle them together. In the picture above you can see how the resulting sleeved bundle can maintain its shape even when hanging in the air.

The sleeved cable will be fed down to one of the case’s pass-through holes and arch round to the header on the motherboard. This will be consistent with the other sleeved cables connected to the motherboard. The few that are not sleeved are just round with black insulation.
A-RGB splitter retention
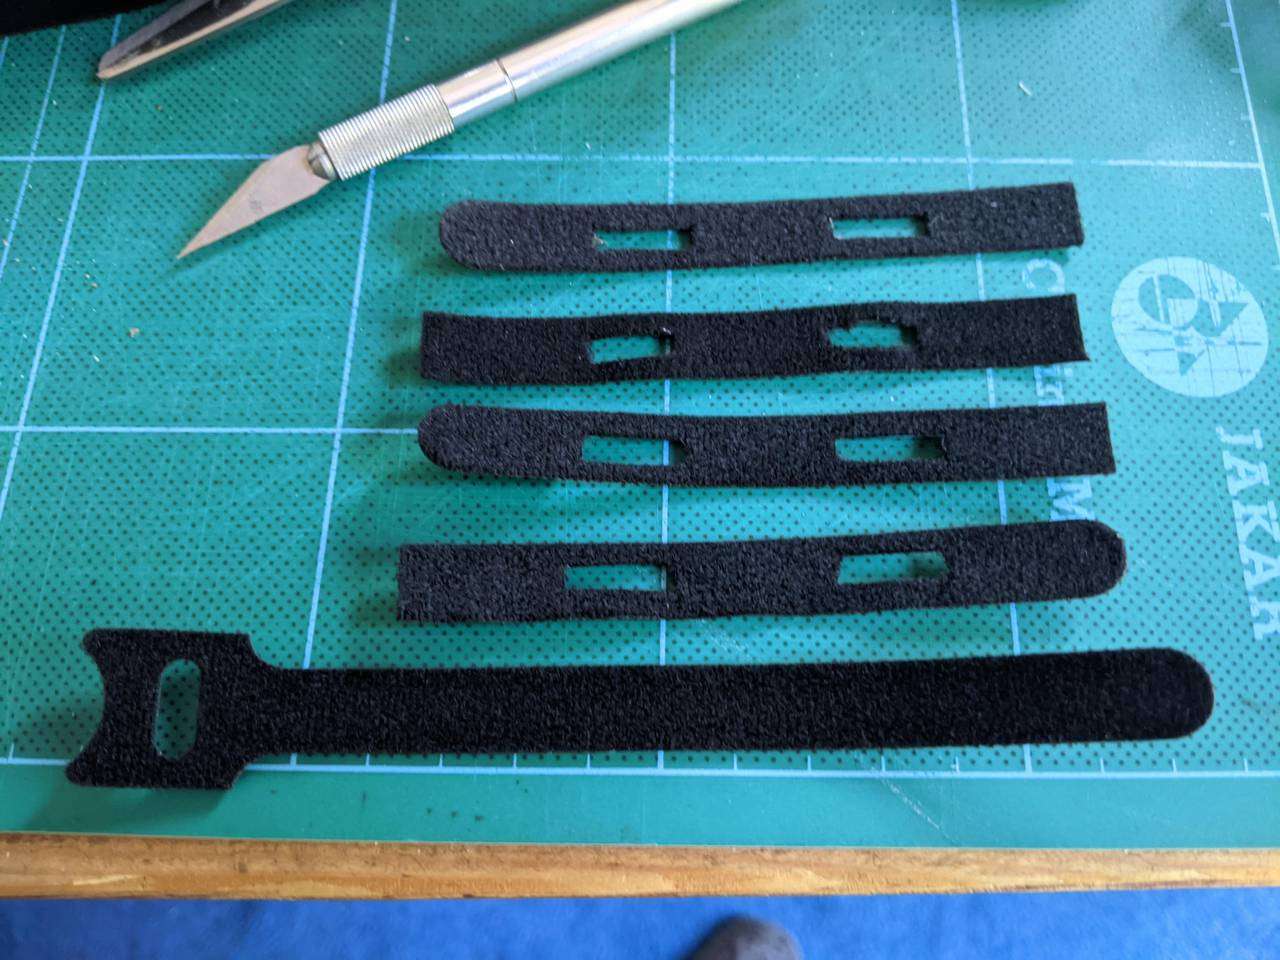
I’m not sure why A-RGB connectors and headers are so weak at holding together. Maybe they are pure friction fit, rather than using spring-loaded or tapered contacts, and the tolerances probably vary. It seems like you could make an in-line connection (e.g. for a splitter and component A-RGB cable) separate just by blowing it, or maybe just gravity. Terrible! So to avoid these splitter connections separating when tucked away, I made some retention straps by cutting down some velcro cable straps.
The rectangular hole was cut to be just big enough for the connector housing to fit through, and either side of the slot will wrap around the back of the housing. With the retention strip undone there is enough slack to be able to push the two connectors together.
With the strap wrapped around against itself, there is enough binding force to prevent the connection from being inadvertently pulled apart, or it simply dropping apart from gravity.
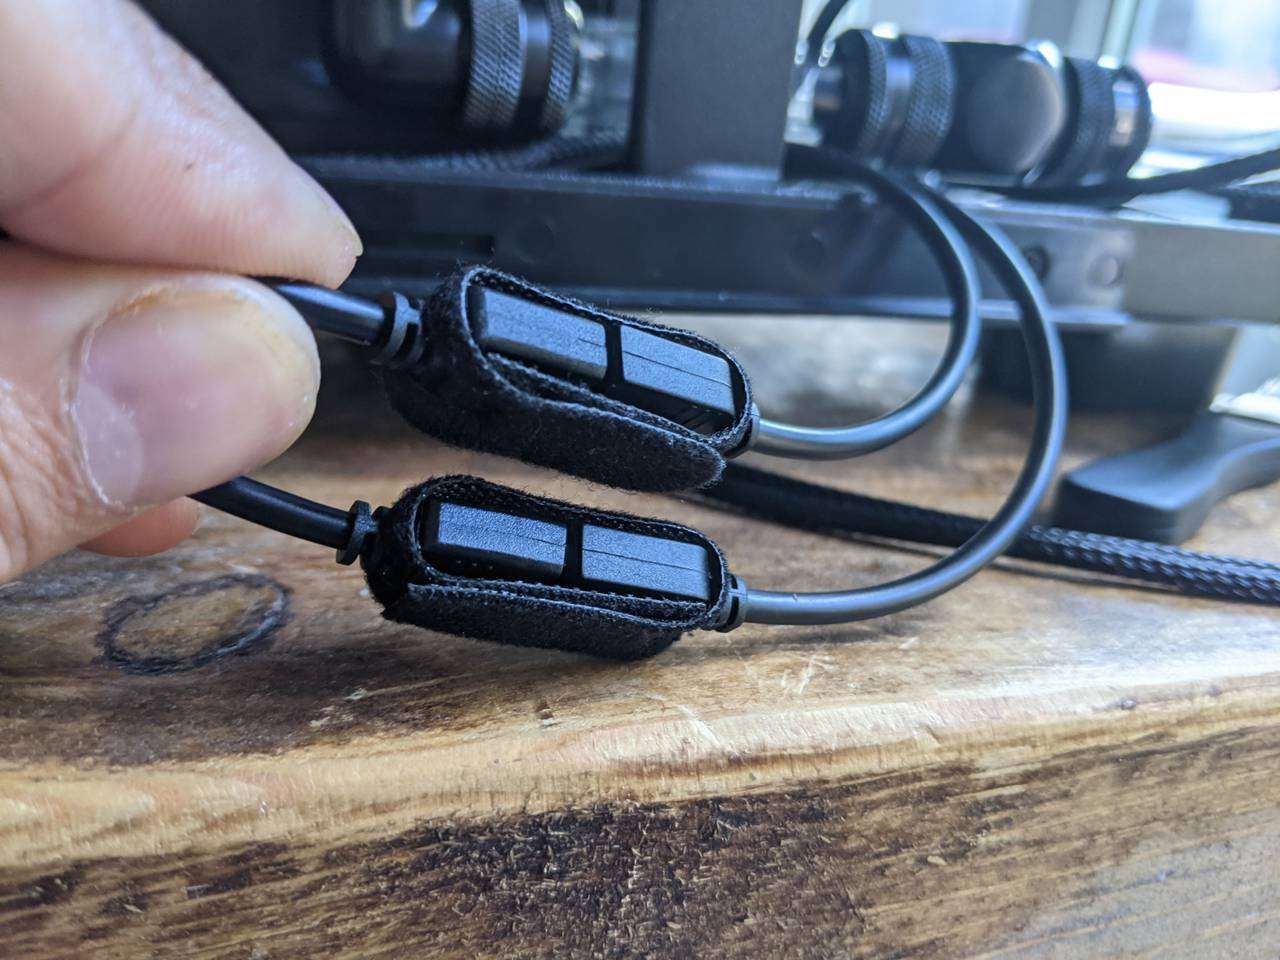
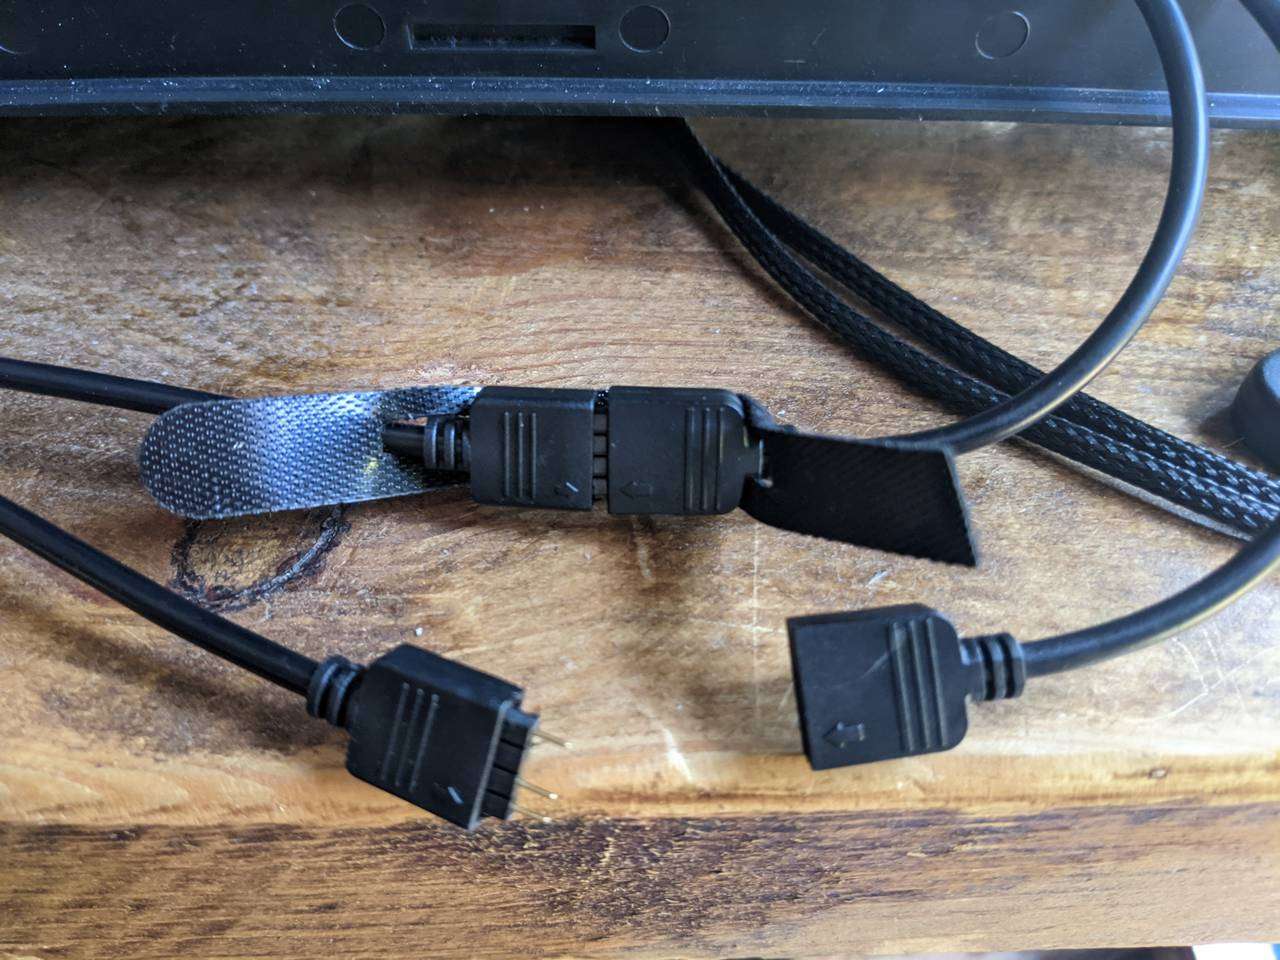
I have two A-RGB strips in each reservoir, so a two-way splitter is used for each pair of A-RGB cables. The set above is for the CPU loop reservoir.
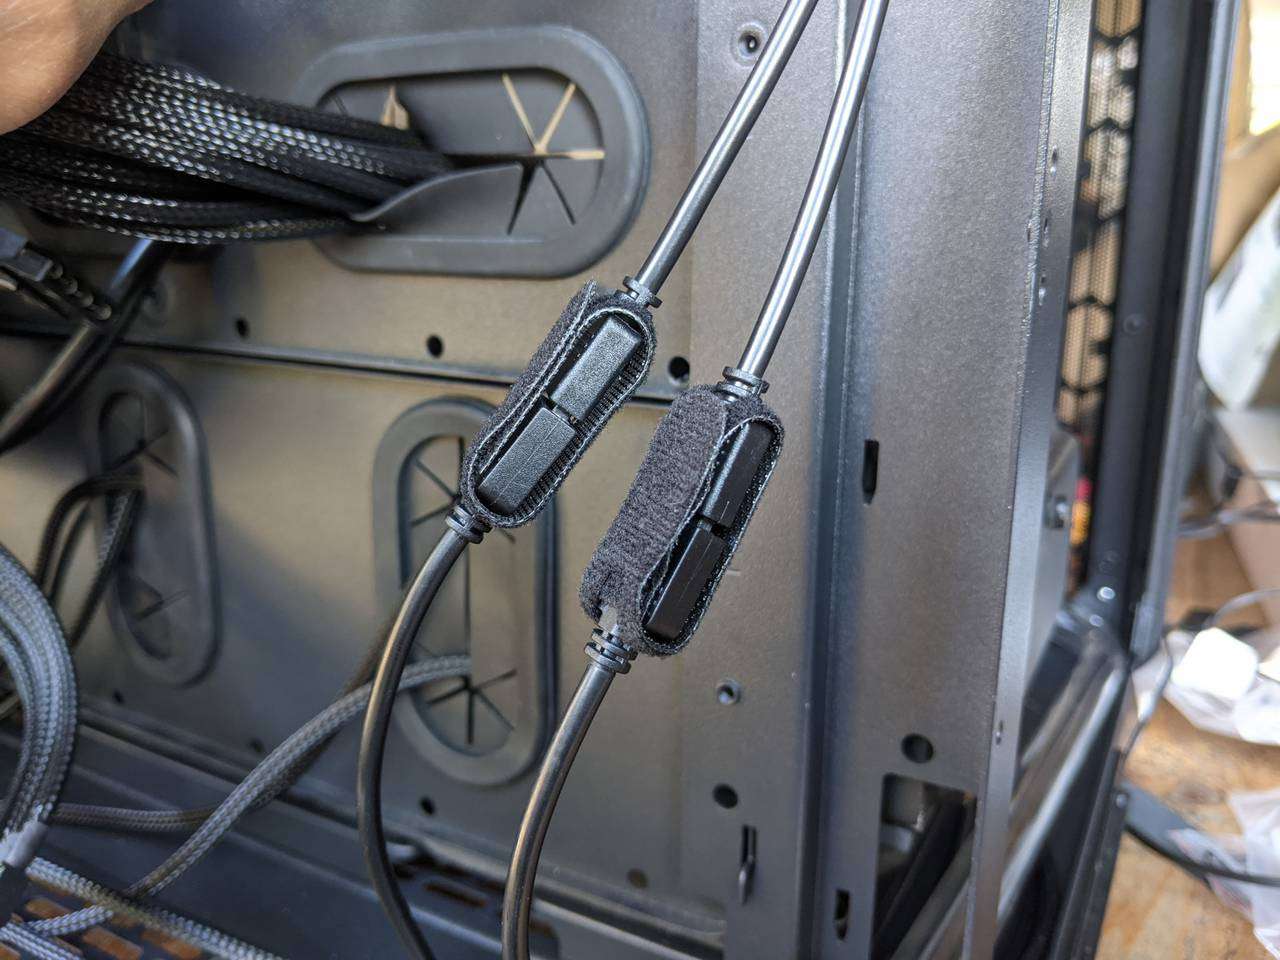
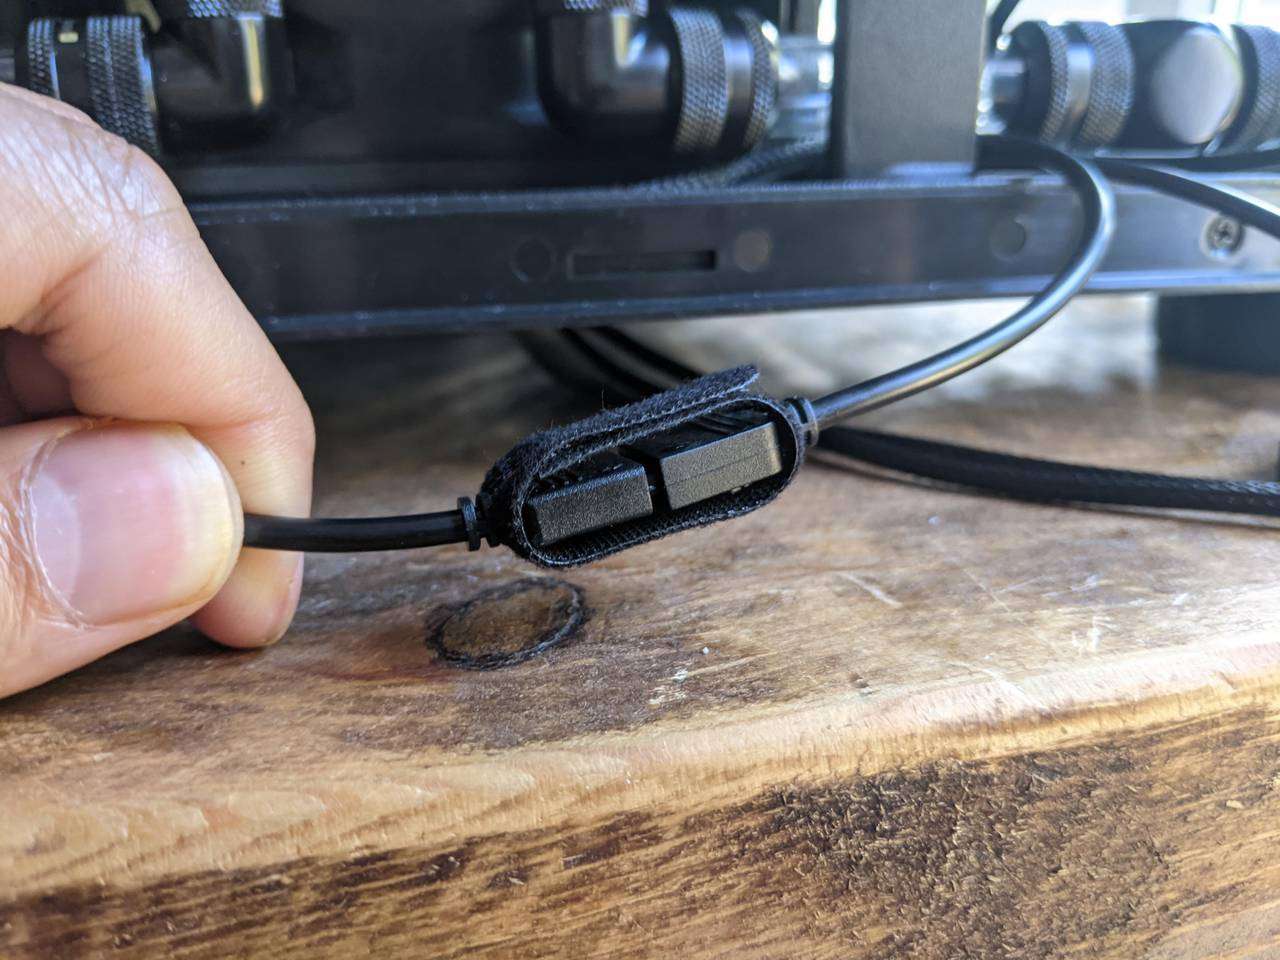
Here you can see a bit better how the retention straps hold the connection securely even with the cables hanging down. This set is for the GPU loop reservoir’s A-RGB lighting.
All of the cables!
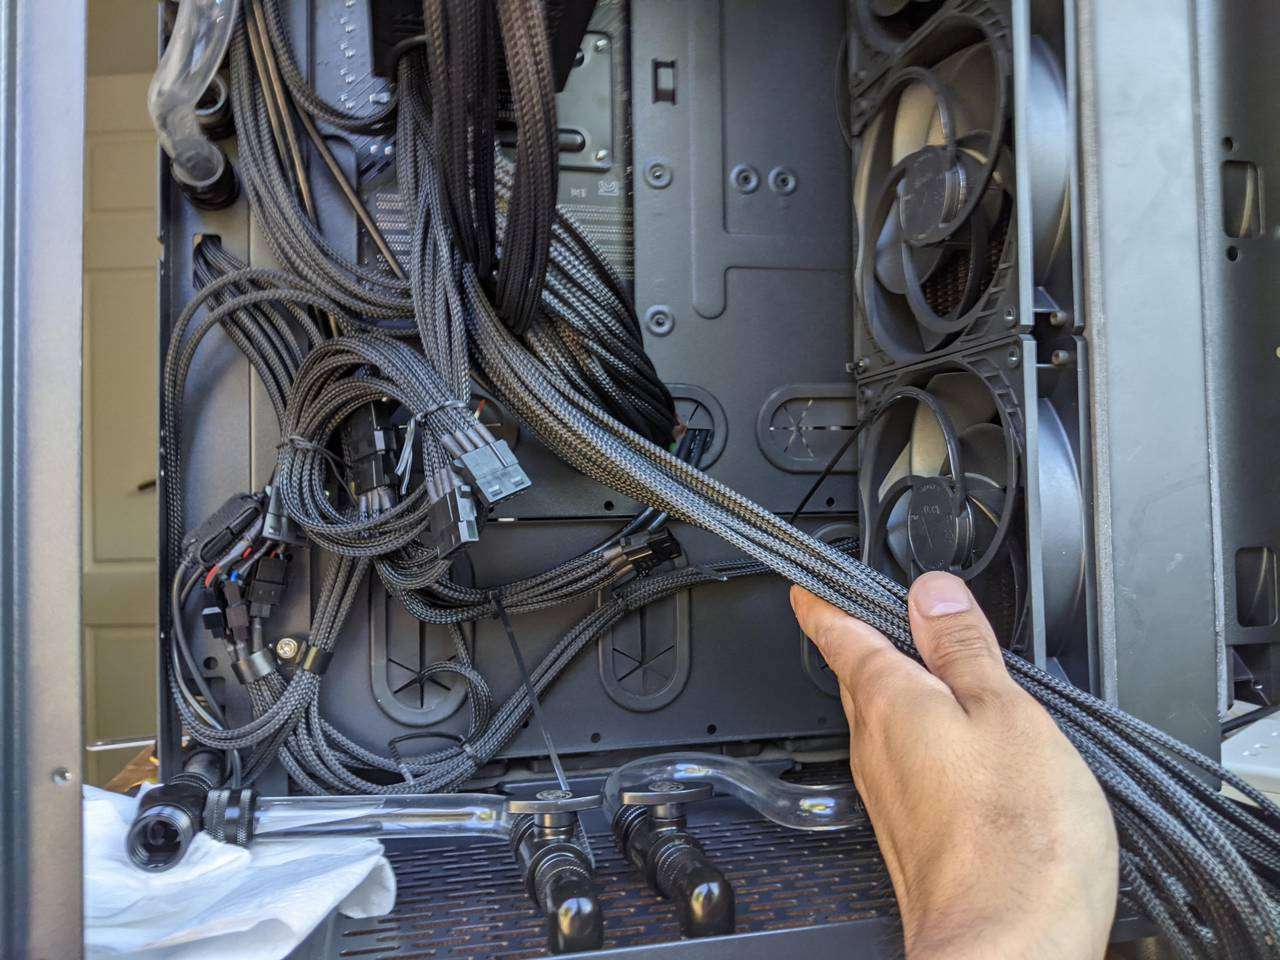
My decision to re-use a non-modular PSU means I have a fair amount of (currently unused) cables from the PSU. This is in addition to the cables from the fans, pump and A-RGB strips. I used zip ties and twist ties to bundle groups of cables together.
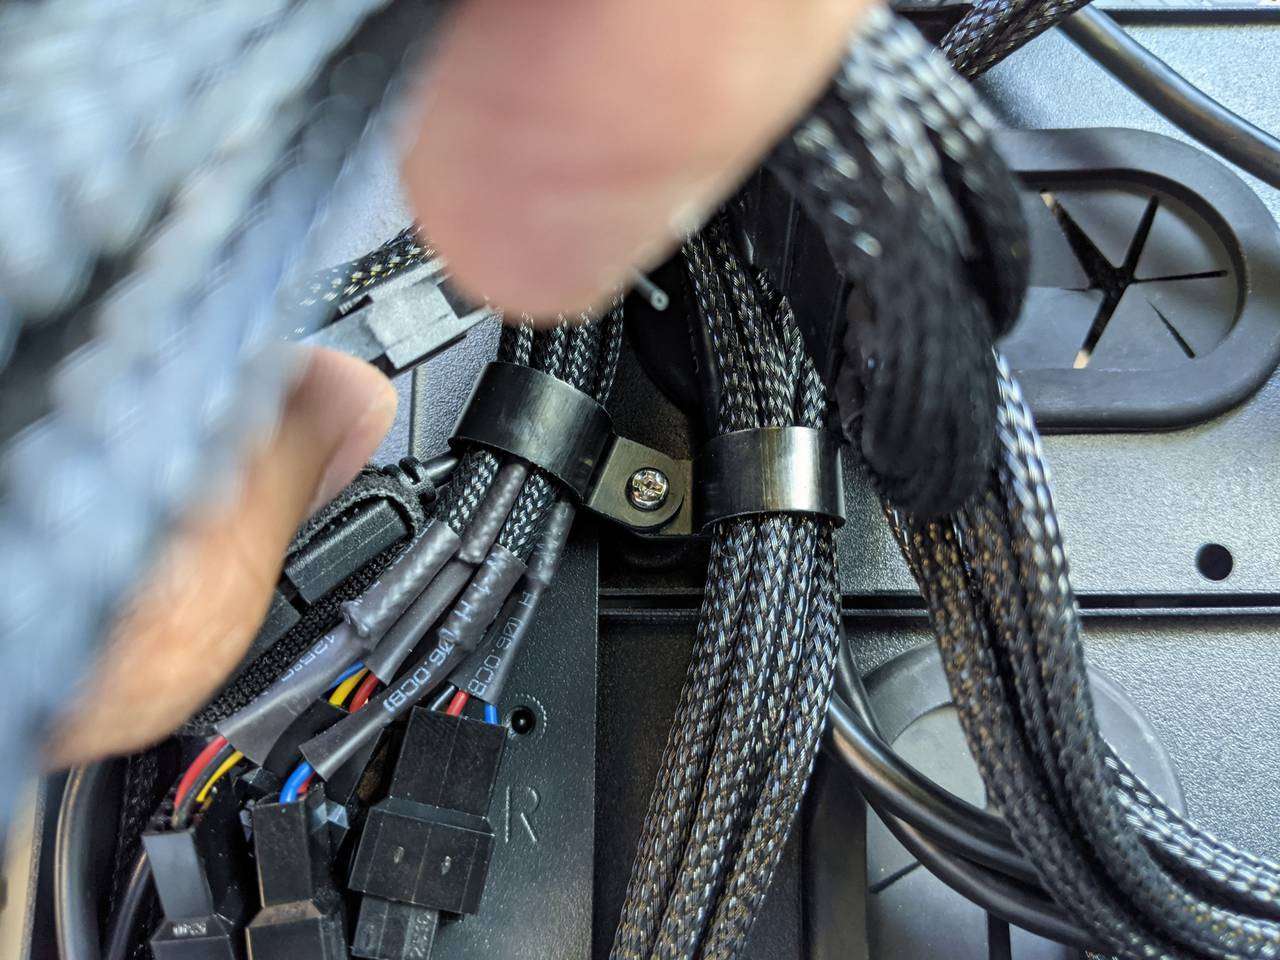
Above, you can two P-clips are used to secure bundles of cables, and they are anchored to the case by an M3 screw into a spare motherboard stand-off that is screwed into a spare threaded hole at the back of the motherboard tray. This threaded hole is one of the E-ATX motherboard stand-off locations.
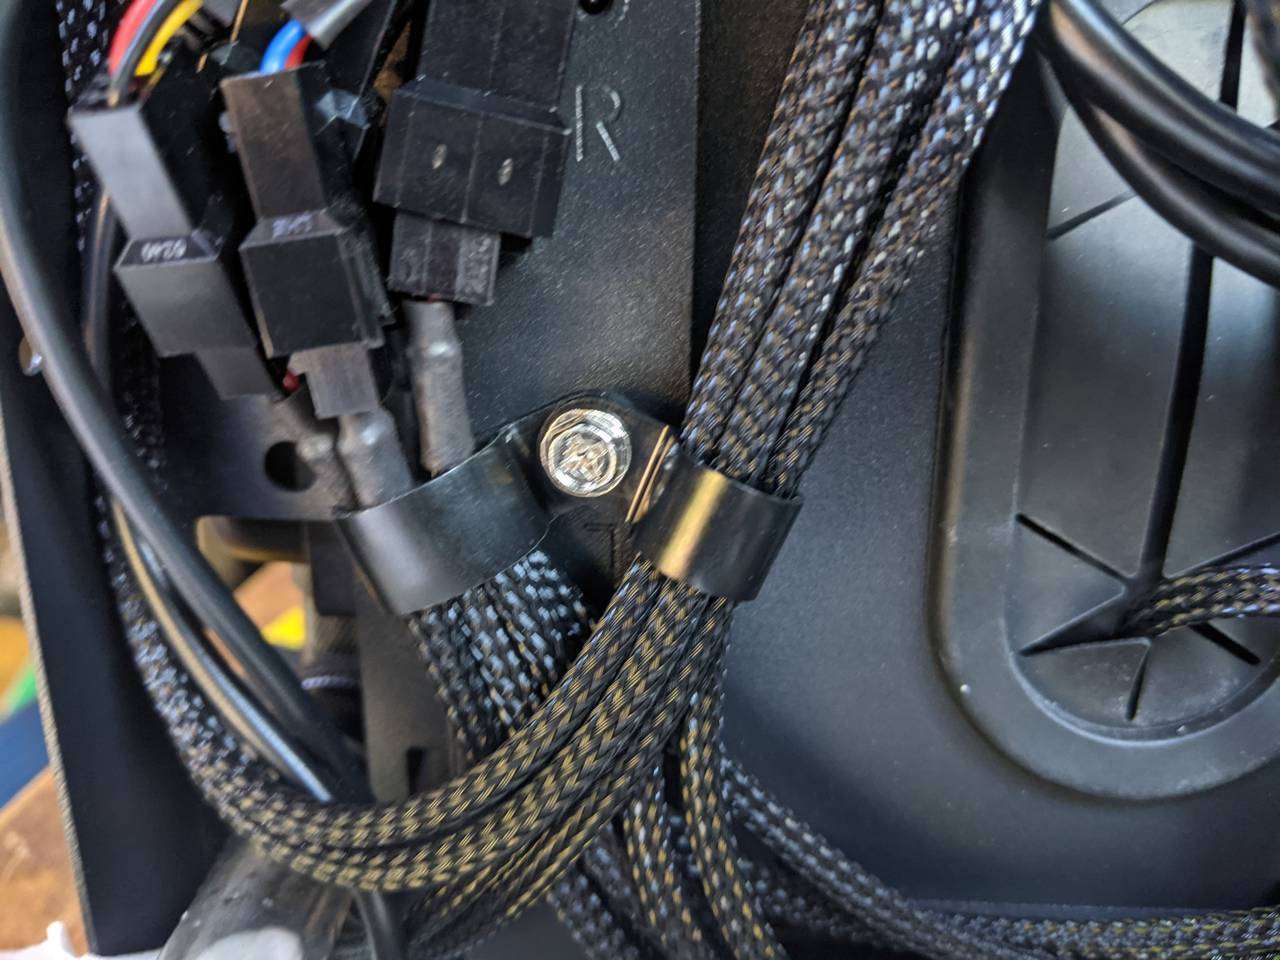
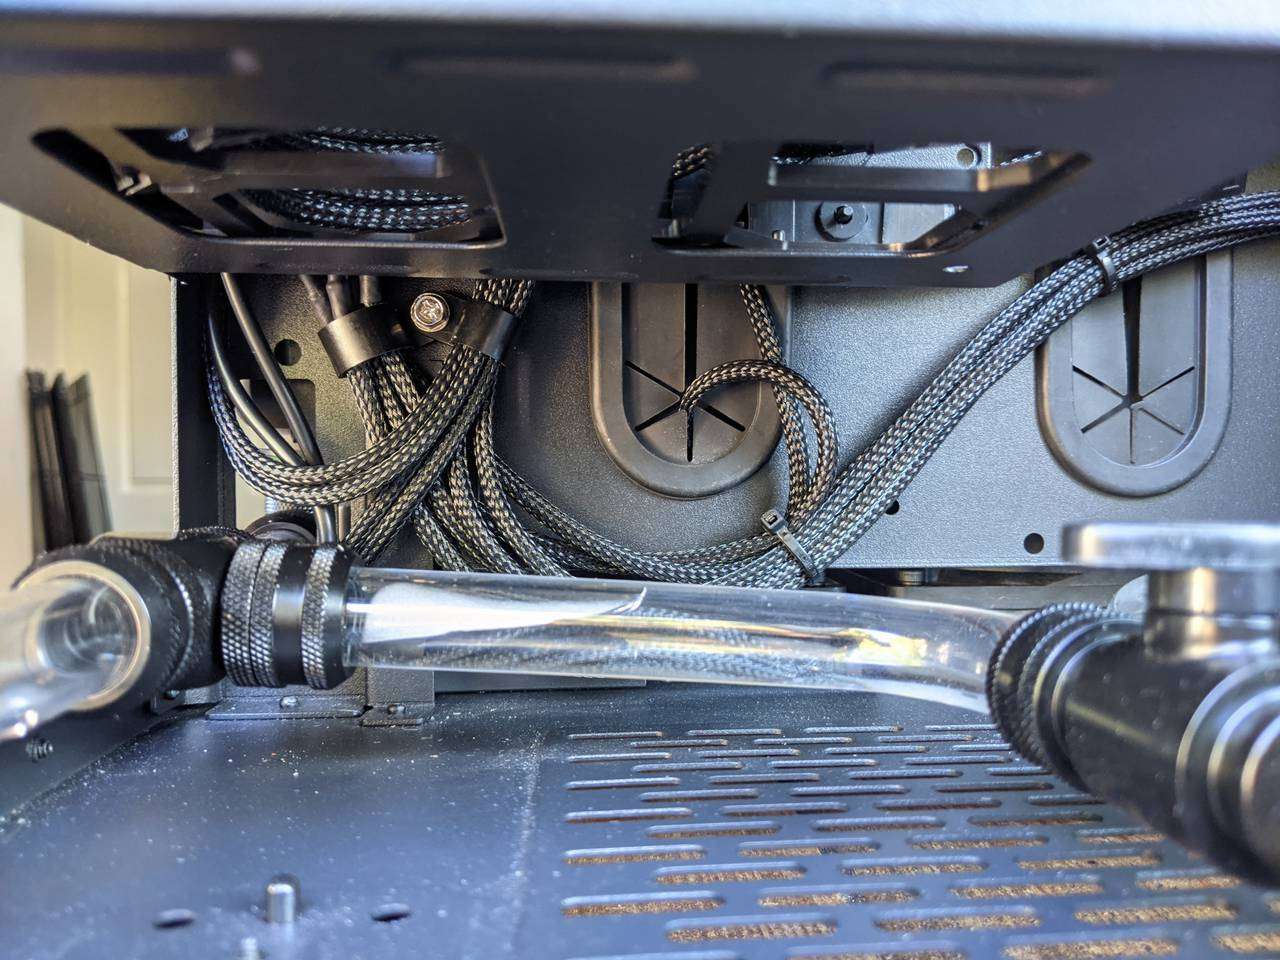
Another set of P-clips were used to secure the cables further down, this time using a long #6-32 screw into a threaded hole in the chassis frame.
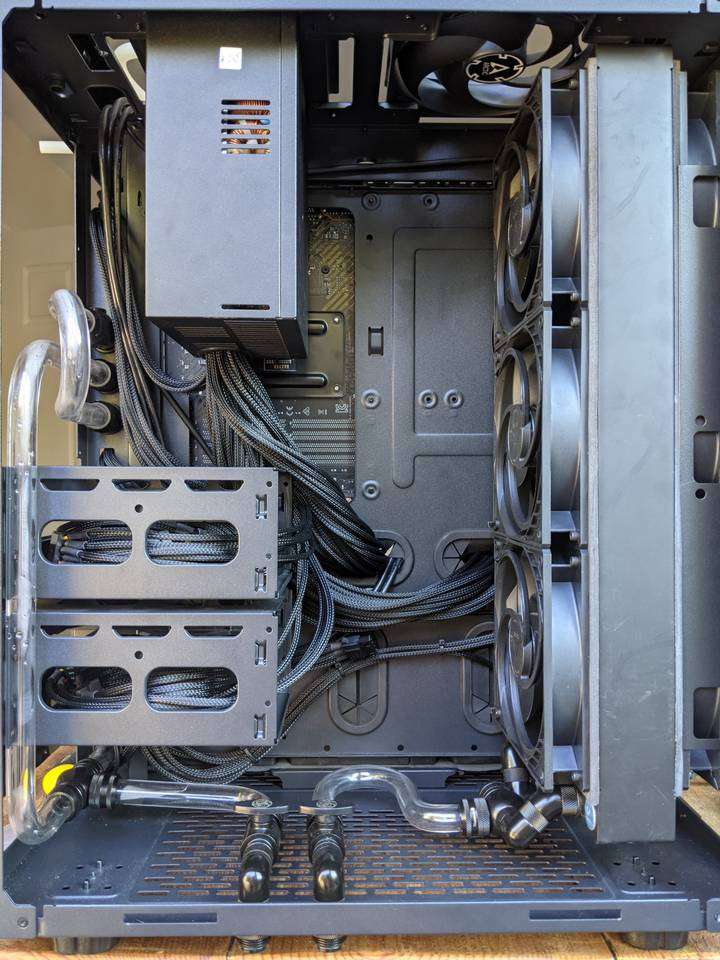
With the hard drive cages installed, all the fan and A-RGB splitter connections are hidden or obscured. I put the unused SATA power cables inside the empty hard drive cages, as I plan to eventually have some large capacity storage (SSD or HDD) in this build in addition to the two NVMe SSD drives installed in the motherboard.
That fat 4-pin Molex connector you can see on show is because I hadn’t yet connected the water pump for the GPU loop as the tubing is unfinished (and so there’s no liquid in the loop to pump!)
I’m really happy with how this looks even with the cables on show. I think the use of the same MDPC-X sleeving on the PSU, pump and fan cables really helps give a consistent and inoffensive look.
Underneath the hard drive cages you can see groups of cables curving up and across. I think the black on black helps this appear tidy even though the cables are clearly visible.
Cable management is boring?
Haha, well I did say I didn’t want to show you the entire process, so I spared you the tedium of routing all the Arctic P14 fan cables (all ten of them!) as well as the various USB and audio cables.
I think a small amount of time and thought put into routing and securing the cables in a build goes a long way, both in making it look tidy and inoffensive, and also maintainable when needing to change, add or remove components.
It would have been nice if the case had more threaded holes to be able to use more of the P-clips rather than zip ties and twist ties, but I thought I would very rarely be removing the CPU radiator’s fans and wouldn’t mind cutting the zip ties in that situation.
Anyway, with all the cables tidied up, it was looking like I just had to add the two segments of hardline tubing to complete the physical installation part of the build, so that’s up next!
Product Links
You can support this website by purchasing items via the following Amazon Associate links.