


My new Fibre-To-The-Premises (FTTP) was installed today, and the new supplier does not offer static IPs to domestic services. As I host a number of web services from my home, I needed a way of updating the IP for these services whenever my dynamic IP changes. This concept is usually called Dynamic DNS (or DDNS for short) and the thing that does the updating is called a DDNS client.
Be prepared
I knew the change from static IP (with my old ISP) to dynamic IP (with my new ISP) was happening, so about a week before the change over to the new ISP I asked for my static IP option to be removed to revert to the standard dynamic IP.
DHCP pools
This was so that when I created or configured some sort of DDNS updater, I could do a live test of the update process by turning off the router, waiting “a bit”, and then turning it on again. This sounds like the classic “turn it off and turn it on again” but there’s actually a reason to it. The public IP assigned from the ISP comes from a “pool” (or group) of IPs. When you turn off the router (which effectively disconnects the modem), it releases your public IP back to the pool, and at some point someone (who presumably turns their modem/router off rather than leaving it on 24/7) turns their router back on and takes your old IP from the pool. Then when you later turn your router back on, you get a different IP, as your old IP was “stolen” by someone else.
You might find if you turn your router off and leave it off for an hour and turn it back on again, you get the same IP. This might just be because no one turned their router on during that time, or there may be some “stickiness” configured at the ISP to try to keep your IP the same.
Cloudflare DNS
I use Cloudflare for various services including their DNS, as it has a solid global infrastructure and an easy to use web interface as well as an API for managing DNS entries.
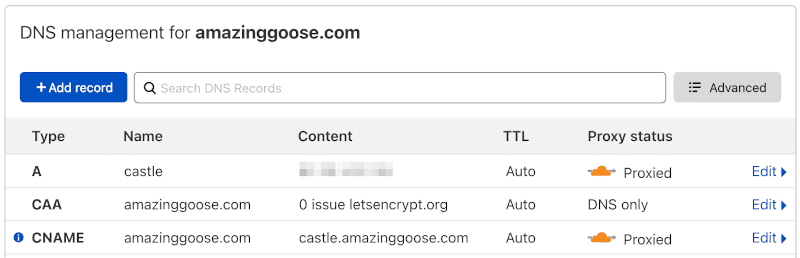
To prepare my DNS for the move to a dynamic IP, I changed all the A records that had my static IP to be CNAME records pointing at castle.amazinggoose.com, which itself is a single A record pointing at my home IP. That way, when my public IP changes, I can just update the IP address for the A record on castle.amazinggoose.com and all the related DNS records will update by virtue of the CNAME records.
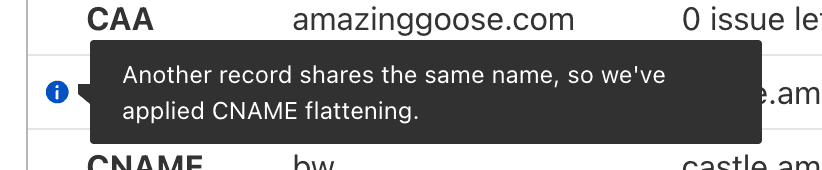
I was surprised and impressed that Cloudflare automatically flattens same-zone CNAME records to the corresponding A record, this removes the usual CNAME-to-A-record DNS hop, giving the ideal DNS latency performance of A records while still having the convenience of CNAMEs.
DDNS client
There are various ways to automatically update Dynamic DNS. Some routers have this ability built-in, but tend to only support a handful of DNS providers and over time these providers will often move their services to paid or business tiers, or even cease to exist entirely.
Updating DNS entries at Cloudflare programmatically is fairly simple and there may already be DDNS client updaters out there written to work with Cloudflare, but I wanted to make my own one with zero dependencies.
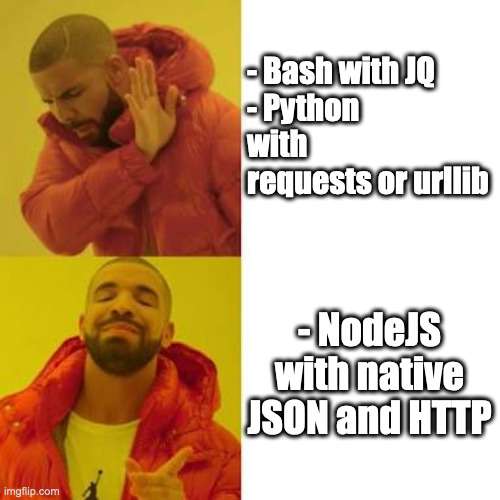
I didn’t want to use Bash with jq for JSON handling as that requires installing jq. For similar reasons, I didn’t want to use Python and requests or urllib.request (yuck) for HTTP.
Javascript, or more specifically NodeJS, is something I use a lot these days and it funnily enough has native support of JSON, and a fairly usable native HTTP client.
Cloudflare API key
If you use Cloudflare for your DNS, you can go to dash.cloudflare.com > 👤 > My Profile > API Tokens > API Keys > Global API Key > View, to see your API key:
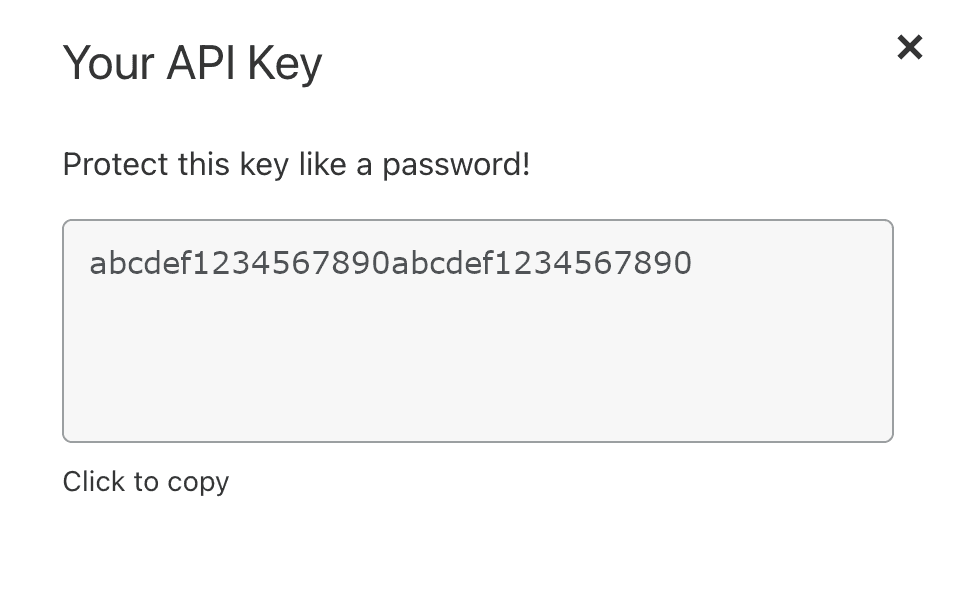
I saved mine in a text file called .cloudflare:
abcdef1234567890abcdef1234567890I started writing my JS file, cloudflare.js, to load this string:
const fs = require('fs');

const apiKey = fs.readFileSync('.cloudflare', 'utf8').trim();
The Cloudflare REST API requires request headers with your account credentials, so I made these part of a commonOptions object to use for all requests, along with the JSON header as I’ll only be sending JSON as the data/payload:
const commonOptions = {
  headers: {
    'x-auth-email': '[email protected]',
    'x-auth-key': apiKey,
    'content-type': 'application/json'
  }
};
NodeJS native HTTPS client, Promisified
The native HTTPS client in NodeJS, https, uses callback functions and event listeners. This may seem antiquated, but it works and can be pretty easily “converted” into a Promisified function. There might be an easier way, but this is how I did it:
const httpsRequest = (url, options, payload) => {
  options = {
    ...commonOptions,
    ...options
  };
  if (payload) {
    options.headers['content-length'] = payload.length;
  }
  return new Promise((resolve, reject) => {
    const req = https.request(url, options, res => {
      let data = [];

      res.on('data', chunk => {
        data.push(chunk);
      });

      res.on('end', () => {
        resolve(Buffer.concat(data).toString());
      });
    }).on('error', err => {
      reject(err.message);
    });
    if (payload) {
      req.write(payload);
    }
    req.end();
  })
}
I could then use this for GET request, as well as PUT/PATCH/POST with payloads, and await the response instead of messing about with callback functions.
Cloudflare DNS record update process
The whole REST API is well documented at api.cloudflare.com but does take some wading through to work out the sequence of requests required in order to do something as simple as update a single DNS record.
Step 1: Get zone ID
As you may have guessed, the DNS zone is “amazinggoose.com”, so you can retrieve the zone info at the GET zones endpoint (Zone > List Zones), with the auth headers mentioned above, and a query parameter for the domain, e.g. GET https://api.cloudflare.com/client/v4/zones?name=amazinggoose.com
{
    "result": [
        {
            "id": "aaaaaa1111122222bbbbbb3333344444",
            "name": "amazinggoose.com",
            "status": "active",
            "paused": false,
            "type": "full",
            "many_other_properties": "and_values"
        }
    ]
}
I removed many of the result array item properties for brevity, as I’m only interested in getting/showing the ID of the zone. You can see that we can refer to this at result[0].id, so I wrote a null-safe reference to this in an async function to call the REST API with my Promisified https client:
const getZoneId = async () => {
  const zones = JSON.parse(await httpsRequest(
    'https://api.cloudflare.com/client/v4/zones?name=amazinggoose.com'
  ));
  return zones.result && zones.result.length && zones.result[0].id;
}
Step 2: Get DNS record
Now that I had the zone ID, I could query the GET zones/:zone_identifier/dns_records endpoint (DNS Records for a Zone > List DNS Records) for the specific DNS record, castle.amazinggoose.com, as a query parameter, e.g. GET https://api.cloudflare.com/client/v4/zones/aaaaaa1111122222bbbbbb3333344444/dns_records?name=castle.amazinggoose.com
{
    "result": [
        {
            "id": "cccccc5555566666dddddd7777788888",
            "zone_id": "aaaaaa1111122222bbbbbb3333344444",
            "zone_name": "amazinggoose.com",
            "name": "castle.amazinggoose.com",
            "type": "A",
            "content": "11.22.33.44",
            "proxiable": true,
            "proxied": true,
            "ttl": 1,
            "many_other_properties": "and_values"
        }
    ]
}
I needed to use the DNS record’s id and content later, so for the next function I made it return the whole result array item:
const getDnsRecord = async (zoneId, name) => {
  const dnsRecords = JSON.parse(await httpsRequest(
    `https://api.cloudflare.com/client/v4/zones/${zoneId}/dns_records?name=${name}`
  ));
  return dnsRecords.result && dnsRecords.result.length && dnsRecords.result[0];
}
Step 3: Determine current public IP
We need to determine the current public IP assigned to the router. Cloudflare provides an endpoint that gives this information at https://cloudflare.com/cdn-cgi/trace, with a text/plain response like this:
fl=341f17
h=cloudflare.com
ip=11.22.33.55
ts=1623189834.303
visit_scheme=https
uag=PostmanRuntime/7.28.0
colo=MAN
http=http/1.1
loc=GB
tls=TLSv1.3
sni=plaintext
warp=off
gateway=off
The IPv4 address after ip= is the important bit, so I split by line, filtered for the right line, split the line by =, and got the second bit (the IPv4 string):
const getCurrentDynamicIp = async () => {
  const trace = await httpsRequest('https://cloudflare.com/cdn-cgi/trace');
  return trace
    .split('\n')
    .find(s => s.startsWith('ip='))
    .split('=')[1];
}
Step 4: Compare the current dynamic IP with the DNS A record’s IP
If the current dynamic IP (of the router) has not changed, there’s no action required, it’s only if the dynamic IP has changed to something different to that of castle.amazinggoose.com. The DNS A record’s content property is its IP address.
    if (currentDynamicIp === dnsRecord.content) {
      console.info('IP is equal, nothing to do!');
    } else {
      console.info('Updating DNS record');
      // make a request to Cloudflare REST API to update the record
    }
Step 5: (Conditionally) update the DNS record’s IP
We only want to update the DNS A record’s IP value, and leave the rest of the DNS record’s properties alone, so we can use the PATCH zones/:zone_identifier/dns_records/:identifier endpoint (DNS Records for a Zone > Patch DNS Record), e.g. PATCH https://api.cloudflare.com/client/v4/zones/aaaaaa1111122222bbbbbb3333344444/dns_records/cccccc5555566666dddddd7777788888, with payload:
{
    "content": "11.22.33.55"
}
and get response, e.g.
{
    "result": {
        "id": "cccccc5555566666dddddd7777788888",
        "zone_id": "aaaaaa1111122222bbbbbb3333344444",
        "zone_name": "amazinggoose.com",
        "name": "castle.amazinggoose.com",
        "type": "A",
        "content": "11.22.33.55",
        "many_other_properties": "and_values"
    }
}
So that ended up in another function:
const updateDnsRecord = async (zoneId, record, ip) => {
  const payload = JSON.stringify({
    content: ip
  });
  return JSON.parse(await httpsRequest(
    `https://api.cloudflare.com/client/v4/zones/${zoneId}/dns_records/${record.id}`,
    {
      method: 'PATCH'
    },
    payload
  ));
}
Tying all the steps together
I wanted to run the script by itself, so needed to wrap the calls to the async functions in an anonymous async function in order to be able to use await. This is the usual Javascript way of doing it, but probably isn’t obvious if you’ve not used async/await in a single script before.
Here’s all the steps put together (along with some useful console commands if you want to see some output of each step):
(async () => {
  try {
    // Step 1: Get zone ID
    console.info('Getting zone id');
    const zoneId = await getZoneId();
    console.debug('zoneId', zoneId);

    // Step 2: Get DNS record
    console.info('Getting DNS record');
    const dnsRecord = await getDnsRecord(zoneId, 'castle.amazinggoose.com');
    console.debug('dnsRecord.id', dnsRecord.id);
    console.debug('dnsRecord.content', dnsRecord.content);

    // Step 3: Determine current public IP
    console.info('Getting current dynamic IP');
    const currentDynamicIp = await getCurrentDynamicIp();
    console.debug('currentDynamicIp', currentDynamicIp);

    // Step 4: Compare the current dynamic IP with the DNS A record's IP
    if (currentDynamicIp === dnsRecord.content) {
      console.info('IP is equal, nothing to do!');
    } else {
      // Step 5: (Conditionally) update the DNS record's IP
      console.info('Updating DNS record');
      const updateResponse = await updateDnsRecord(zoneId, dnsRecord, currentDynamicIp);
      console.debug('updateResponse:', updateResponse);
      if (updateResponse && updateResponse.success) {
        console.info('success:', updateResponse.success);
        console.info('updated IP:', updateResponse.result.content);
      } else {
        console.error('success:', updateResponse && updateResponse.success);
      }
    }
  } catch (error) {
    console.error(error);
  }
})();
Full script
When I was happy the script was working correctly when ran directly in a terminal with
node cloudflare.js, I took out most of the console commands to only output the essential info, i.e. the conditional check and the update response. I changed the .cloudflare API key text file to be located in /root as I wanted to run the script as root via cron. I could have set it up to run under another user, but this will run on my home server so I’m fine with running cron scripts as root.
const https = require('https');
const fs = require('fs');

const apiKey = fs.readFileSync('/root/.cloudflare', 'utf8').trim();

const commonOptions = {
  headers: {
    'x-auth-email': '[email protected]',
    'x-auth-key': apiKey,
    'content-type': 'application/json'
  }
};

const httpsRequest = (url, options, payload) => {
  options = {
    ...commonOptions,
    ...options
  };
  if (payload) {
    options.headers['content-length'] = payload.length;
  }
  return new Promise((resolve, reject) => {
    const req = https.request(url, options, res => {
      let data = [];

      res.on('data', chunk => {
        data.push(chunk);
      });

      res.on('end', () => {
        resolve(Buffer.concat(data).toString());
      });
    }).on('error', err => {
      reject(err.message);
    });
    if (payload) {
      req.write(payload);
    }
    req.end();
  })
}

const getZoneId = async () => {
  const zones = JSON.parse(await httpsRequest(
    'https://api.cloudflare.com/client/v4/zones?name=amazinggoose.com'
  ));
  return zones.result && zones.result.length && zones.result[0].id;
}

const getDnsRecord = async (zoneId, name) => {
  const dnsRecords = JSON.parse(await httpsRequest(
    `https://api.cloudflare.com/client/v4/zones/${zoneId}/dns_records?name=${name}`
  ));
  return dnsRecords.result && dnsRecords.result.length && dnsRecords.result[0];
}

const getCurrentDynamicIp = async () => {
  const trace = await httpsRequest('https://cloudflare.com/cdn-cgi/trace');
  return trace
    .split('\n')
    .find(s => s.startsWith('ip='))
    .split('=')[1];
}

const updateDnsRecord = async (zoneId, record, ip) => {
  const payload = JSON.stringify({
    content: ip
  });
  return JSON.parse(await httpsRequest(
    `https://api.cloudflare.com/client/v4/zones/${zoneId}/dns_records/${record.id}`,
    {
      method: 'PATCH'
    },
    payload
  ));
}

(async () => {
  try {
    const zoneId = await getZoneId();
    const dnsRecord = await getDnsRecord(zoneId, 'castle.amazinggoose.com');
    const currentDynamicIp = await getCurrentDynamicIp();
    if (currentDynamicIp === dnsRecord.content) {
      console.info('IP is equal, nothing to do!');
    } else {
      console.info('Updating DNS record');
      const updateResponse = await updateDnsRecord(zoneId, dnsRecord, currentDynamicIp);
      if (updateResponse && updateResponse.success) {
        console.info('success:', updateResponse.success);
        console.info('updated IP:', updateResponse.result.content);
      } else {
        console.error('success:', updateResponse && updateResponse.success);
      }
    }
  } catch (error) {
    console.error(error);
  }
})();
You could re-use this script for your own Cloudflare DNS A record by changing:
- the
x-auth-emailstring to your Cloudflare login email address - changing ‘castle.amazinggoose.com’ to the DNS A record’s name
- creating the
.cloudflaretext file, populated with your Cloudflare API Key
Setting up the script to run periodically
I copied the cloudflare.js script to /usr/local/src on my server, and then created a cron file at /etc/cron.d/cloudflare-ddns-updater with the following content:
* * * * * root /root/.nvm/versions/node/v14.17.0/bin/node /usr/local/src/cloudflare.jsIf you’re not familiar with cron jobs, the stars are at the time positions and mean “every”:
# ┌───────────── minute (0 - 59)
# │ ┌───────────── hour (0 - 23)
# │ │ ┌───────────── day of the month (1 - 31)
# │ │ │ ┌───────────── month (1 - 12)
# │ │ │ │ ┌─��──────────── day of the week (0 - 6) (Sunday to Saturday;
# │ │ │ │ │ 7 is also Sunday on some systems)
# │ │ │ │ │
# │ │ │ │ │
# * * * * * <command to execute>So every minute of each hour in each day of each month on any day of the week, run the script. Or, more simply, run the script once every minute.
The filepath to node is because I use nvm to manage multiple NodeJS versions. You can just find yours with which like:
[root@server1 ~]# which node
/root/.nvm/versions/node/v14.17.0/bin/node
As I haven’t appended a redirection of the command output to a specific log file, it just ends up in /var/log/cron. Here’s an extract showing three executions of the cron’d script:
Jun  8 23:26:01 server1 CROND[8247]: (root) CMD (/root/.nvm/versions/node/v14.17.0/bin/node /usr/local/src/cloudflare.js)
Jun  8 23:26:03 server1 CROND[8246]: (root) CMDOUT (IP is equal, nothing to do!)
Jun  8 23:27:01 server1 CROND[8457]: (root) CMD (/root/.nvm/versions/node/v14.17.0/bin/node /usr/local/src/cloudflare.js)
Jun  8 23:27:03 server1 CROND[8456]: (root) CMDOUT (Updating DNS record)
Jun  8 23:27:03 server1 CROND[8456]: (root) CMDOUT (payload: {"content":"11.22.33.66"})
Jun  8 23:27:04 server1 CROND[8456]: (root) CMDOUT (success: true)
Jun  8 23:27:04 server1 CROND[8456]: (root) CMDOUT (updated IP: 11.22.33.66)
Jun  8 23:28:01 server1 CROND[8659]: (root) CMD (/root/.nvm/versions/node/v14.17.0/bin/node /usr/local/src/cloudflare.js)
Jun  8 23:28:03 server1 CROND[8658]: (root) CMDOUT (IP is equal, nothing to do!)
So you can see:
- the script ran and there was no change needed
- the script ran and the public IP was different, so it updated the DNS A record
- the script ran and there was no change needed
Does it work?
Yes, it works. I manually caused my public IP to change by the “turn it off and on again” trick and the cron script noticed the new IP and updated the DNS record.
When my new FTTP connection was installed, and the router was connected to the new fibre modem, the server’s Internet connectivity was restored and the script noticed the new IP and updated the DNS record.
Could it be better? Probably yes, but it works well enough for me as it is, and is written in a way that should make it easy to update if the Cloudflare REST API or the trace endpoint ever change in future.
No doubt there are some better ways of writing the Javascript, but I think you can see the essential elements in play and can adapt or rewrite this to suit your purposes, perhaps even in a different language, it’s all just web client stuff really (apart from the cron bit).
Hope someone finds this useful, I couldn’t find a straightforward simple script for this when I wanted it, so wrote my own. Maybe this will give you the solution or starting point (or understanding) that you need to do this for your own Dynamic DNS needs.